
Add Contacts of [name of patient]
This is adding the contacts (carers or next of kin) for a patient in your practice. The contact themselves, however, does not need to be a registered patient but you should have obtained permission from them to keep their details on the computer.
Once a contact is added, they are stored on Vision 3 as either a carer or next of kin, and can be picked if they are a contact (carer or next of kin) for other patients.
- In either Registration or Consultation Manager, select the patient about whom the contact is being made, eg an elderly or disabled person who is being cared for.
- If in Registration, click on the Contacts button.
- Click on Add under the option Contacts of [patient name].

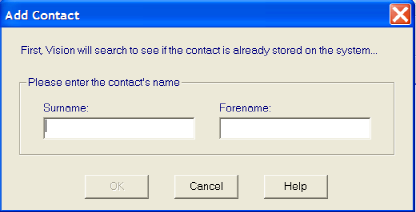
- An Add Contact screen displays letting you enter a surname, or part surname, and optionally, a forename (Tab across). When you press OK, Vision 3 will search to see if the contact is already stored on the system. This will include any non-patient contacts you may have previously added in Organisation – Person.
- If Vision 3 can find the name from its database, it may present a list for you to choose from (highlight the name and click on Select), or if matched, it goes straight to the Contact Relationship screen (see step 7).
Alternatively, if none of the people is the one you want, click on Add (step 6). At the Add Contact screen – press Add to add a new contact.

If Vision 3 cannot find the name you entered, The screen is headed with the message: Vision has not found any patients or persons with the name you entered.
It assumes that the contact is not someone with the practice and you need to add them (see step 6).
- At the Person-Add screen, enter as many details as you can about this contact. In particular, for contacts who are not patients, click on Add under Main Address in order to enter the address and contact number for the carer. Up to three telephone numbers can be stored.
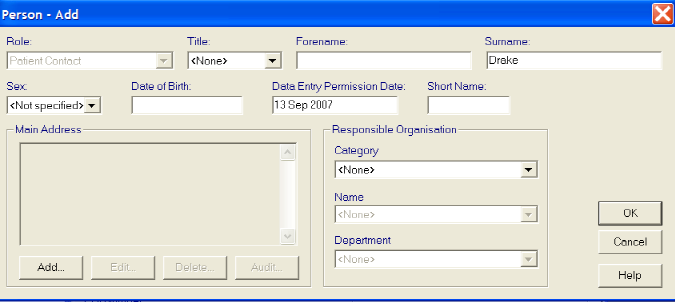
You will be able to select Role on the next screen, when you click OK.
The Short Name must be unique, up to 5 characters.
MOST IMPORTANT is the Date Entry Permission Date. In the case of contacts who are not patients registered with the practice, enter the date on which they gave permission for this information to be entered. This defaults to today's date. Although not mandatory and you can complete the screen without this date, the Data Protection Act requires you to obtain this permission.
Click OK.
- Next, at the Contact Relationship – Add screen, tick either the Carer box or the Next of Kin box.
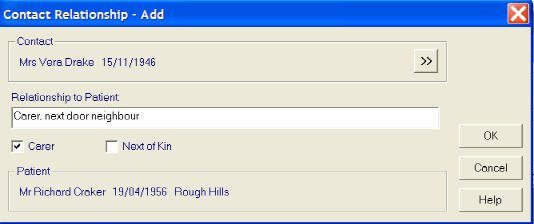
In Relationship to Patient, it will insert either Carer or Next of Kin, and you can add further free text to describe the relationship of the contact to the patient, eg daughter, friend etc. Click OK.
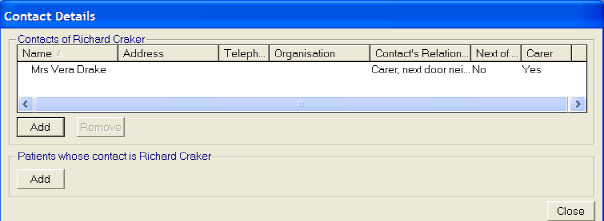
- This completes the Contact entry. A patient icon by the contact line indicates that this contact is currently a registered patient.
![]()
Note: You can also add carers, who are not registered with your practice, within File Maintenance, Organisation (eg County Council, Department Social Services) and Person, using the Role of Carer.
To remove a contact, point to the carer line at the top of the large window, click and highlight, then click on Remove. Click OK at the Delete screen.
To edit a carer's detail, point to the contact line at the top of the large window, right click and Edit. This takes you first to the Contact Relationship – Update screen where you can update the Relationship to Patient. In addition, for carers who are not patients at your practice, you can also click on ![]() to go back to the Person–Update screen.
to go back to the Person–Update screen.