Creating a Basic SmartTags Template
The following details how to create a basic SmartTags template for use with Vision 3:
- From the Vision 3 front screen, select Utilities - Word Processor
 .Training Tip - You can open a SmartTag document directly from Windows - File Explorer if required, but you do need at least one standard Vision 3 merge field within a SmartTag document so it makes sense to open them from within Vision 3
 - The Vision Word Processor screen displays:
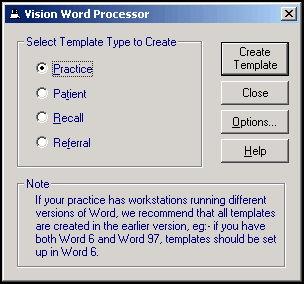
- Select Referral.Training Tip - We recommend you select Referral as it has the most Vision 3 merge options available.
- Select Create Template.
- A new document displays ready for you to create your template.Note - Up to this point SmartTags templates and standard Vision 3/Vision Anywhere templates are created the same way.
-
Select File - Open.
-
Navigate to the SmartTags document you are using as the basis for your template. This can be the Blank(SmartTags3x4).doc or any other SmartTags document you have access to. Select Open and the SmartTags Word document displays.
-
A Microsoft Word message displays, warning that this document runs a SQL command, select Yes to continue:

-
Create your template document in the usual way by simply typing where text is required. At least one standard Vision 3 merge field is required within a SmartTag document, select Insert Merge Field
 and select the type of data required. Where an existing merge field does not exist, you need to define your own using SmartTags.
 -
You should have a SmartTags option between File and Home screens:

If you do not have this option, select View - Macros, select ShowTagsHelp and then Run.
-
The SmartTags Helper screen displays. This is where you define the merges between your letter and the patient record:

-
With your cursor on the document in the appropriate position, click into Build your SmartTag and start defining the merge required. SmartTags consist of the following key elements:
Training Tip - With a patient open in Consultation Manager, select Keep to save the element specified. You can select Test after adding an element to check you are on the right track. You can select Undo to return to your last Keep if you are not happy with the element added. Data SDA Name
The SDA is where the data required is stored in Vision 3, start typing the name of the area required, for example, FREETEXT for Note Pad entries, HAE_SCREEN for Haematology Screening Tests or GENERAL for Medical History entries.
Training Tip - You can list all the areas by name from Consultation Manager - List - Select List, this is useful if you are struggling to find what you want.As you type, matching data types display in the bottom left pane of the SmartTags Helper, select the Structured Data Area (SDA) required and the details available display in the bottom right hand pane:

If more than one SDA matches your criteria, the options display in the bottom right pane, double click the one required to select it:

Select the detail required and it displays in Build your SmartTag.
Training Tip - The following selections are optional, they simply help define the amount of detail you want in the letter.ReadCode
Note - You do not need to enter any clinical terms if you are happy with the terms included in an SDA.A clinical code is indicated by brackets ( ) straight after the DataSDA Name with no space. Enter the Read code required:
-
Use the full five digits of a code to select just one code, for example, (246..) only picks up the one code.
-
Use less than the full five digits of a code to select the hierarchy under the code, for example, (246) picks up code 246 and everything under it.
-
You can include more than one code by separating them with a comma, for example, (C10..,H33..) with no spaces.
-
You can exclude a code from the result by preceding it with a minus, for example, (246,-246n.,-246m.) which looks at all codes that start with 246 but excludes 246n. and 246m..
-
Defaults to the last matching entry of this type, double click first from the bottom right pane to display the first matching entry of this type.
Sort Order
The order and number of records that display is indicated by a full stop . and then the criteria in brackets ( ) with a colon between them, for example, .(3) would return the last three records of this type, .(3:1y) would return the last three records of this type in the last year. You can also enter a t at the end to display the results in a table, for example .(3:1yt).
Columns
The SDA data can be specified by using a # and selecting from the list that now displays in the bottom right pane. This is different for each SDA, for example, #ade to display the information in those sections only, this can be in the order you require.
Training Tip - As you work through the key elements, the text highlighted in green indicates what you are defining by displaying in bold. If you enter invalid criteria, it highlights the invalid section in red, be warned this displays in red if you have not finished a definition too.A structured SmartTag, may look something like this bp.(3)#ade:

Which would return, the Date, Description and Value of the last 3 blood pressure results for a patient.
-
-
Select Insert to add the SmartTags to your document.
-
With a patient open in Consultation Manager, from SmartTags Helper, select Test to check the SmartTags created does return the information required. Select Undo to return to the last time you selected Keep.
Note - If there is no data of the type being merged, 'not found' displays after the SDA name. As some SDA names are not useful, for example, 'General', the [Result Title] enclosed in square brackets allows you to replace the SDA name with your own description, for example, [Asthma] would display 'Asthma not found'. -
Finally, select Save to save this SmartTag.
Repeat the process from Step 12 - Step 15 wherever you need a SmartTags in your document.