Selecting a Clinical Audit Group
You can browse the list of Clinical Audits and select a group from a single audit line. This enables you to make the group into a Work Group, then select a secondary group with which to merge/remove/combine patients:
Note - If you select an input group from the clinical audit browser, then each time that search is run, it will use the latest generation of that audit line. If you want to run the search later using the patient list as it was originally, then you need to rename and save the group.
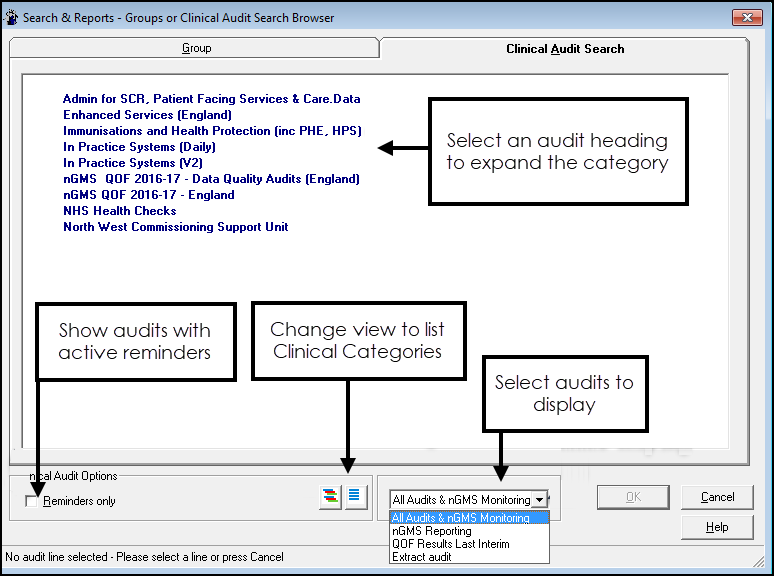
- Select the Clinical Audit Search tab and the audit groups display.Note - You cannot select an audit group, you need to select an individual group from a clinical category.
- Optionally, the view can be refined:
- Select the Reminders Only box, to display audits with active reminders.
- Select Show all Clinical Categories to expand all the audits.
- Change the audit category from All Audits & nGMS Monitoring via the drop-down list.
- Double click on an Audit Group heading to display the Clinical Categories.
- Double click on the Clinical Category to display the groups.
- Double click on an individual group and the Patient Groups view refreshes and includes your chosen search. If you select the Date column, the audit group displays at the top of the list.
- You then have several options:
- Add another group from either Clinical Audit or Patient Groups.
- Make the audit group into a Work Group
 .See Work Groups for details.
 - View the patients, their relevant clinical detail (select a patient name); or right click within the list of patient names to sort, print, save group, or open Consultation Manager for a specific patient.
Note – To print this topic select Print  in the top right corner and follow the on-screen prompts.