Adding Immunisation Data
Once your patients are sorted into patient groups you can add the immunisation data into Vision 3.
There are two ways of adding data:
- From Adding Immunisation Data using Vision+ you can add a clinical term to all patients
- Use Adding Immunisation Data into Vision 3 using Smart Clinic to add a clinical term specifying type of vaccination, batch number and site of vaccination to all patients
Adding Immunisation Data using Vision+
To add immunisations using Vision+:
- Log into Vision 3 as usual.
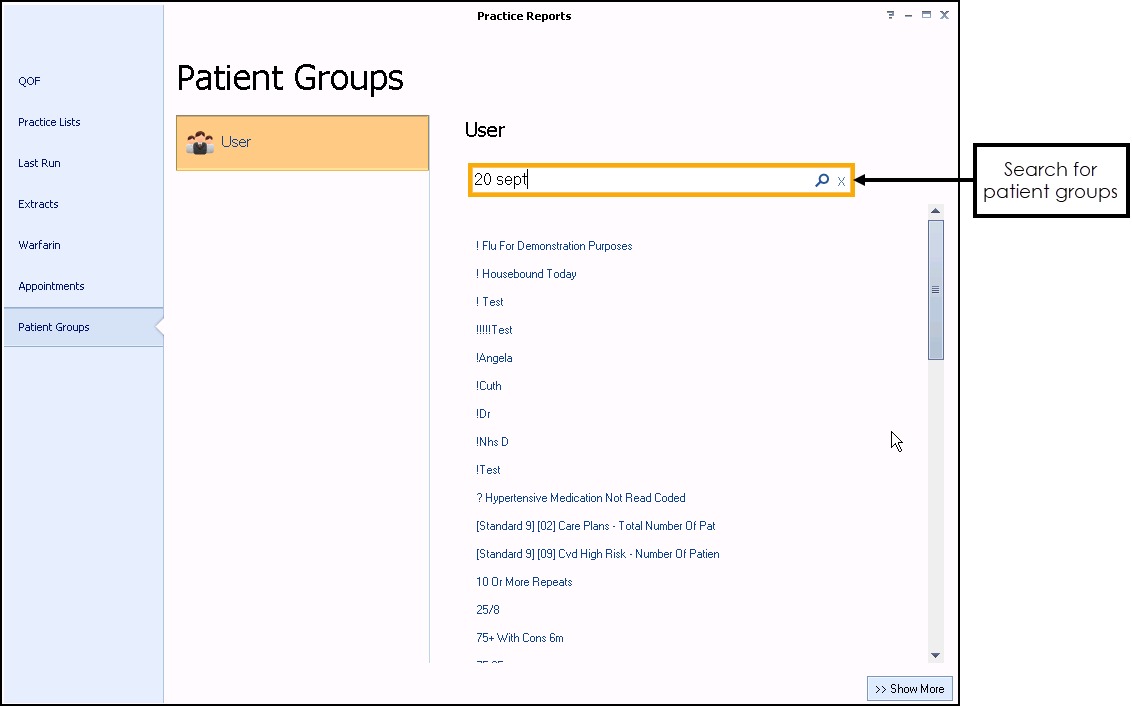
- From the Windows Notification Area, right click Vision+
 and select Practice Reports - Patient Groups:
 - In search, enter the description of the first patient group, for example "20 sept" and select Search
 .
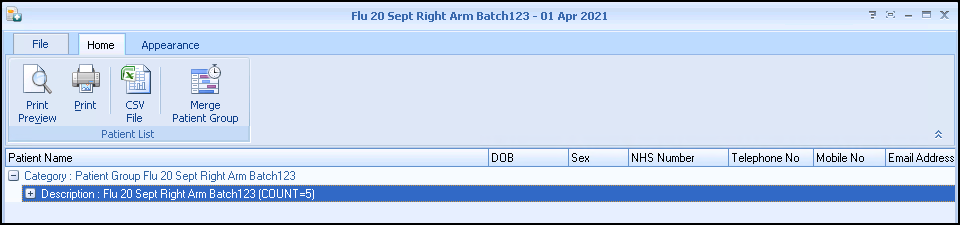
. - Select the group required and the patient group page displays:
- To view patient details, select Expand
 on the description line.
 - From the Practice List Report highlight the description line and select Merge Patient Group
 .
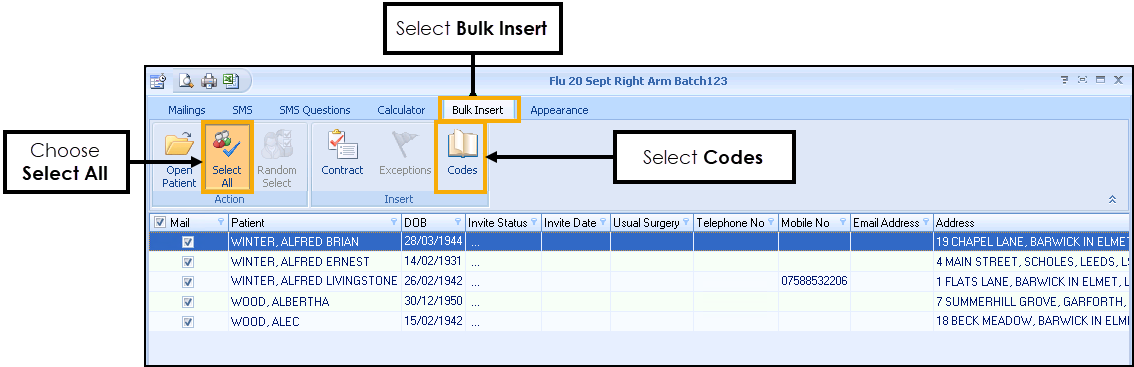
. - The Mailings screen displays, select the Bulk Insert tab:
- Choose Select All to select all the patients in the group.
- Now, select Codes.
- The SNOMED CT/ Read term Code Search page displays.
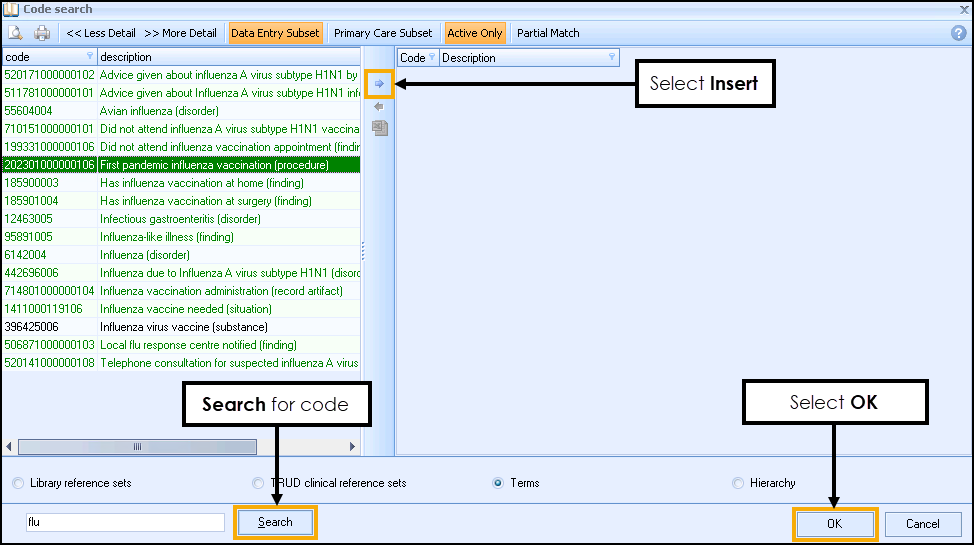
- England only - From the SNOMED CT code search screen, select Active Only to display active codes.
- If you do not know the code, enter the search term for example “flu” into the search at the bottom of the screen and select Search.
- Scotland, Wales and Northern Ireland only - From the Readcode search screen enter the search term and select Search:
- Highlight the clinical term for a flu vaccination procedure and select Insert
 .
. - Select OK.
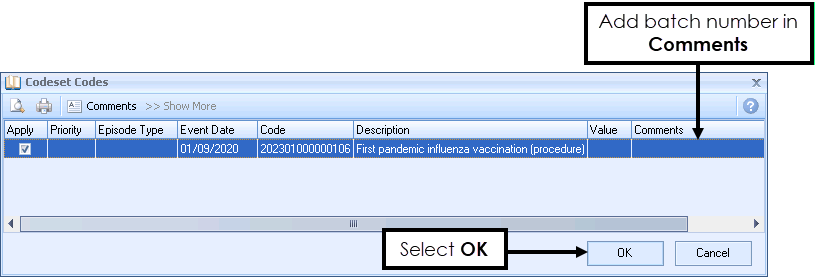
- The Codeset Codes screen displays:
- In the Comments column, enter the batch number from the patient group name.
- Select OK to apply the code.
- The Patient’s record is updated:


- From the Vision 3 front screen, select Consultation Manager
 .
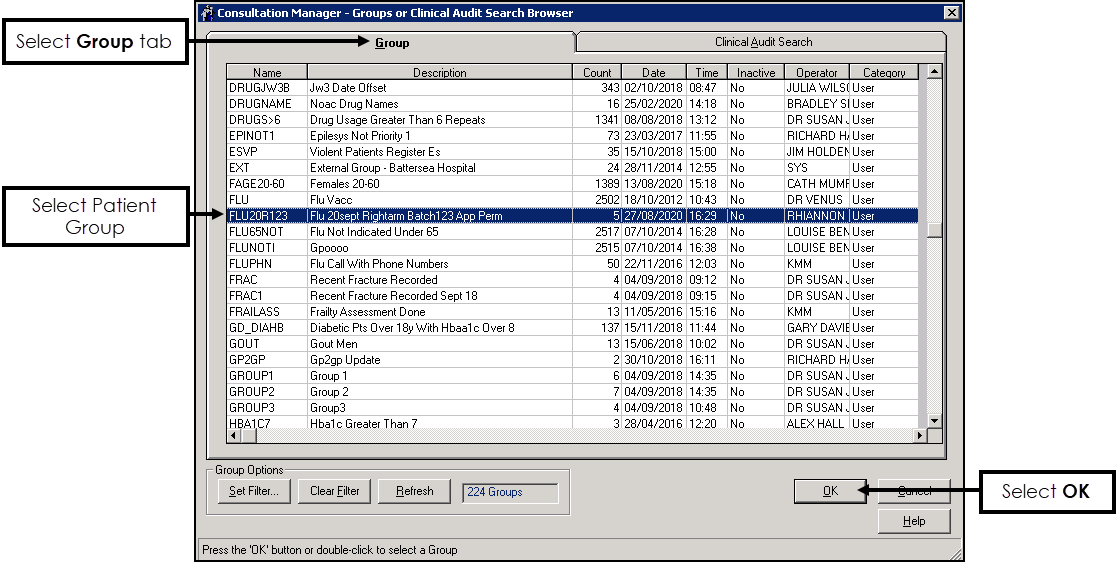
. - Select Consultation - Select a Patient Group.
- The Consultation Manager - Groups or Clinical Audit Search Browser displays:
- Under the Group tab, highlight the patient group you want to edit and select OK.
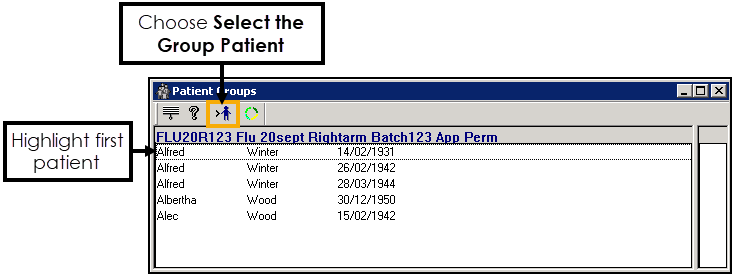
- The Patient Groups screen displays:
- Select the first patient in the list and select Select the Group Patient
 .
. - The patient's record opens in Consultation Manager:
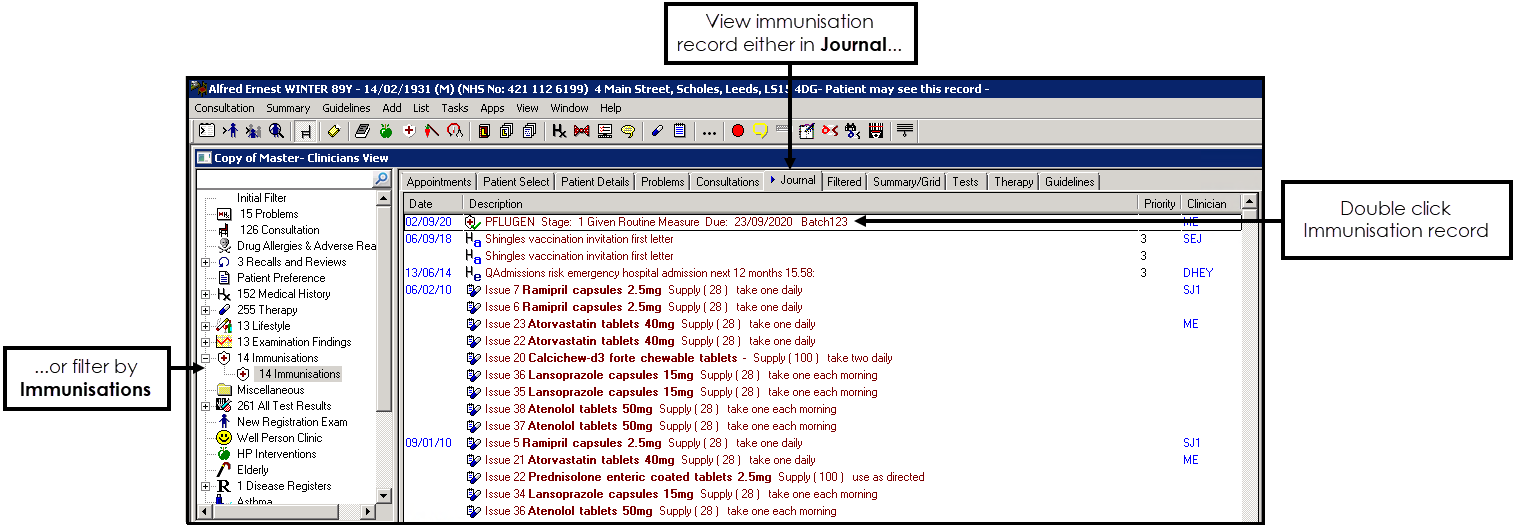
- View the immunisation record either in Journal or filter by Immunisation.
- Double click the immunisation record to edit it.
-
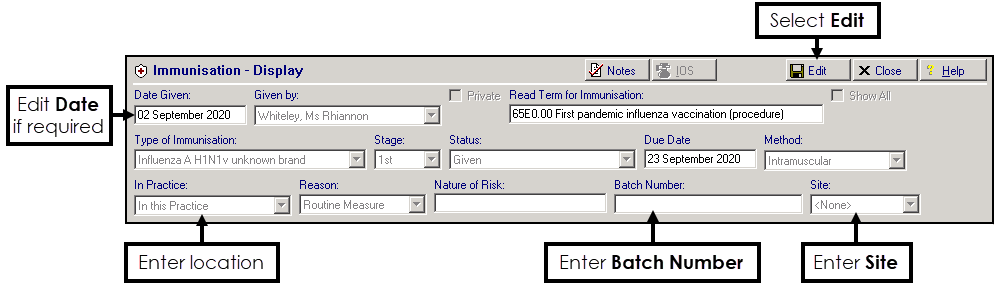
Select Edit and update the immunisation record as required:
- Batch Number - Enter the batch number from the patient group name.
- Site - Enter the immunisation site from the patient group name.
- In Practice - Defaults to In this Practice, update location as required
- Date - Defaults to the date that the clinical code was added.
- At this point it is recommended to update the patient's record with any changes from the tear-off slip, such as ethnicity or contact details.
- To view the next patient in Consultation Manager select Next Group Patient
 .
. - Repeat steps 8 to 12 until all records are updated.
Adding Immunisation Data into Vision 3 using Smart Clinic
Add Influenza Batch Details
You need to add each batch to the “Influenza – Seasonal” vaccine, which then automatically files the correct vaccine type and batch details, including vaccine name.
To add influenza batch details:
- Open Smart Clinic
 .
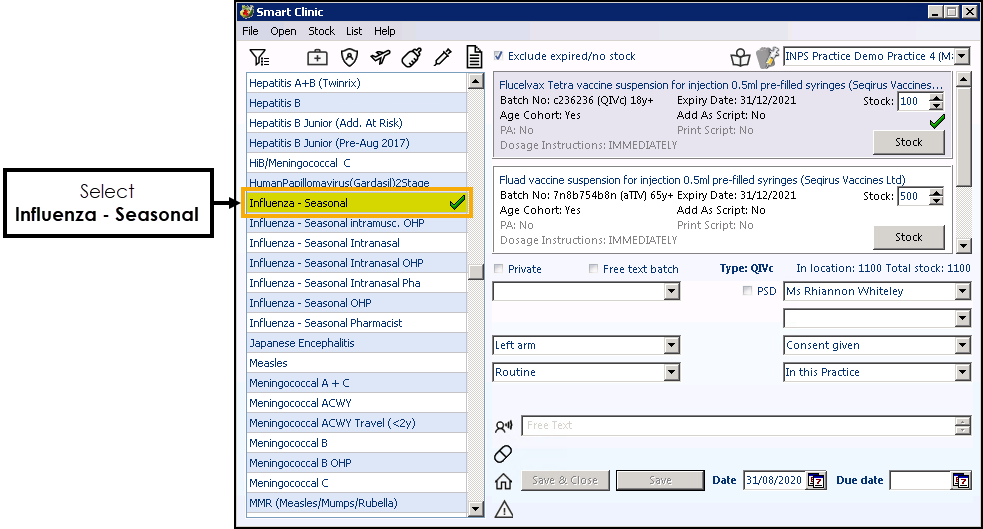
. - Select Influenza – Seasonal:
- Select Stock and Add Stock.
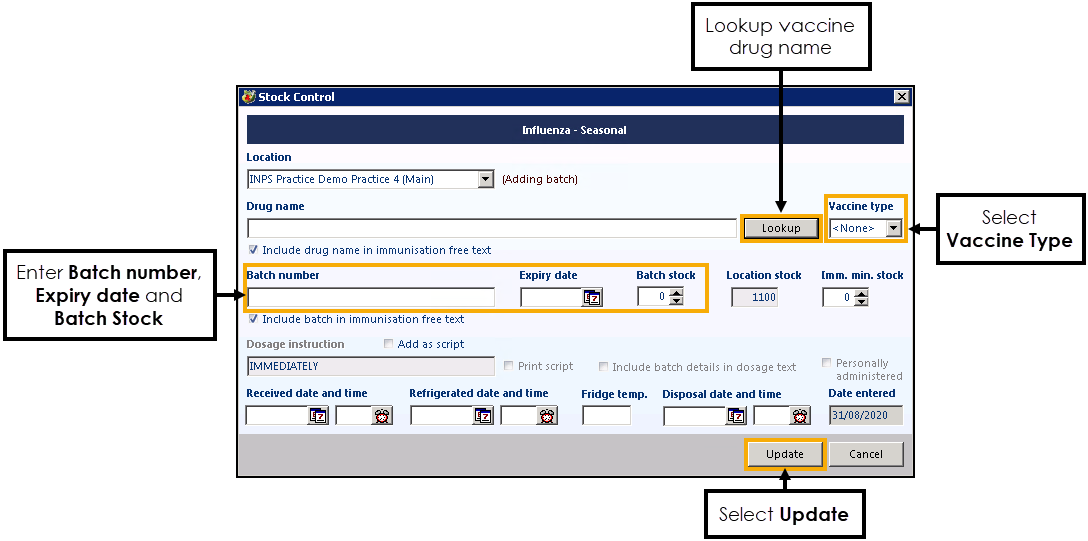
- Use Lookup to find and select the vaccine administered from the drug list available, for example, QIVc, QIVe or TIV:
- Enter the Batch number and Expiry date.
- For Batch stock enter the amount of vaccines you have been delivered for use in practice. If you are not using Smart Clinic for stock control enter 9999.
- Select Update to save the batch card.
Repeat this process for each separate batch number.
Bulk Entering the Immunisation
To bulk enter immunisations:
- Open Smart Clinic .
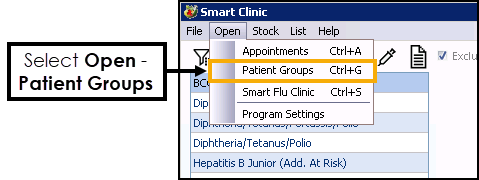
- Select Open - Patient Groups:
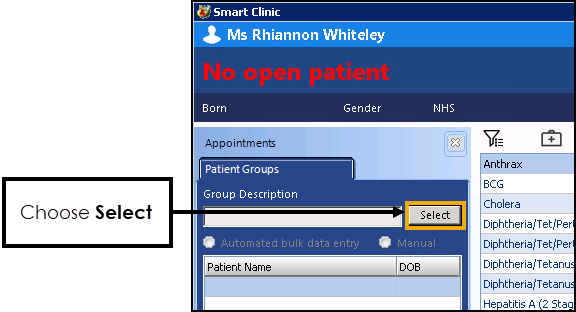
- From the Group Description section, choose Select:
- Locate the patient group you wish to use for bulk data entry and choose Select. All patients in the group are displayed.
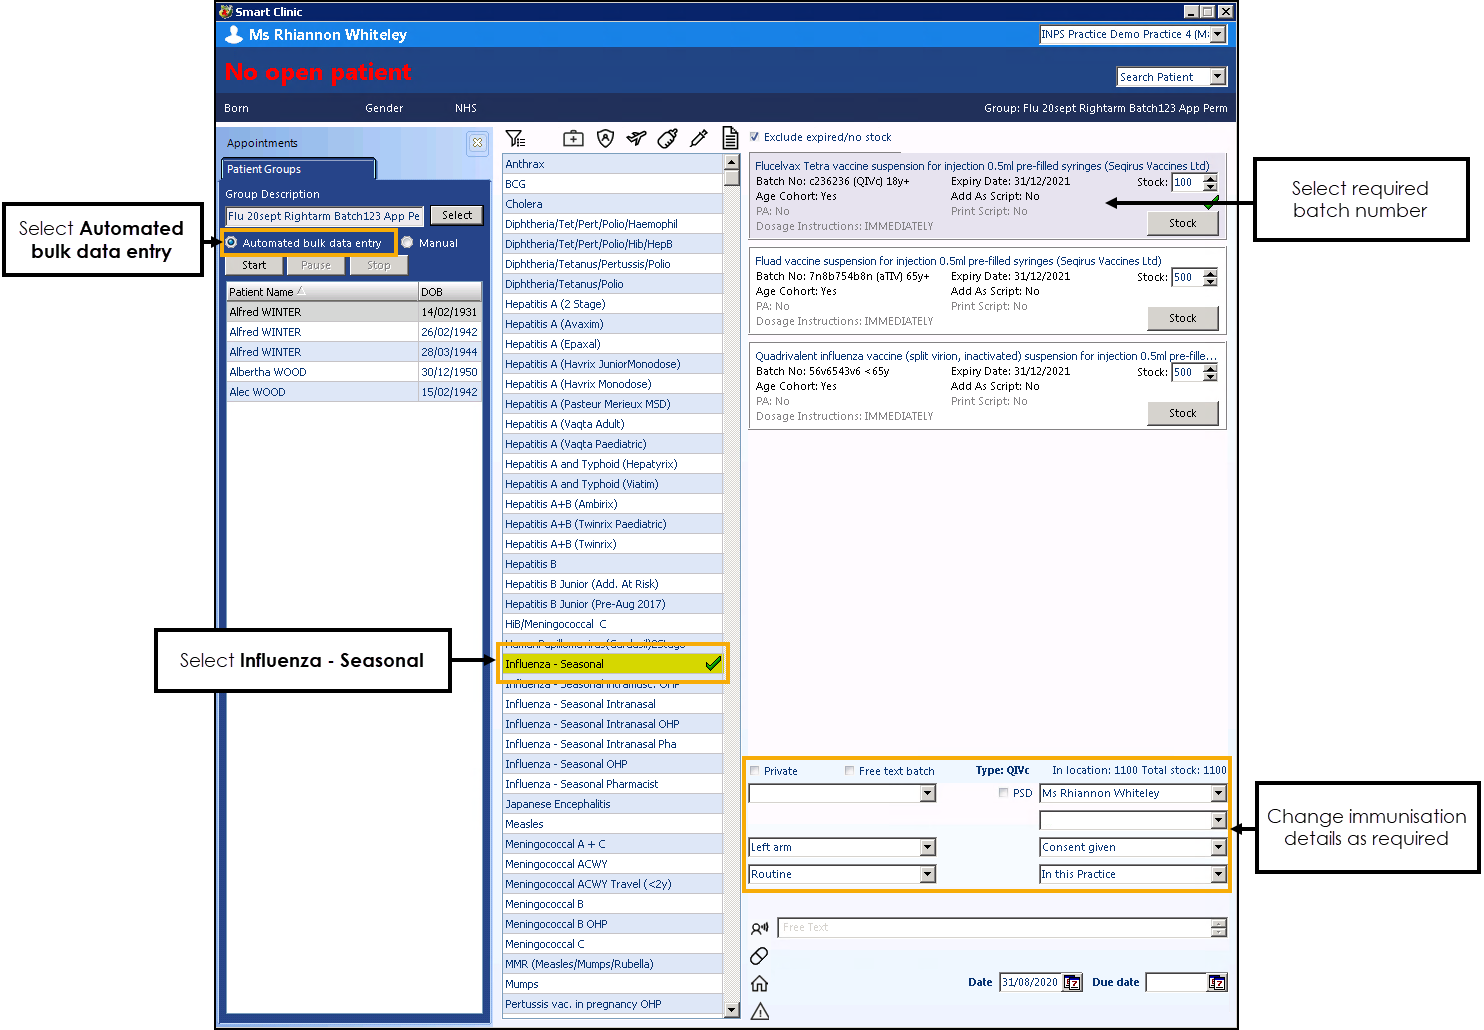
- Select Automated bulk data entry:
- Select Influenza – Seasonal to list all the batches available.
- Select the required batch number for the patient group.
- Change the immunisation details as required, for example, site details or consent given.
- Once you are happy with all the details on the immunisation form, select Start:
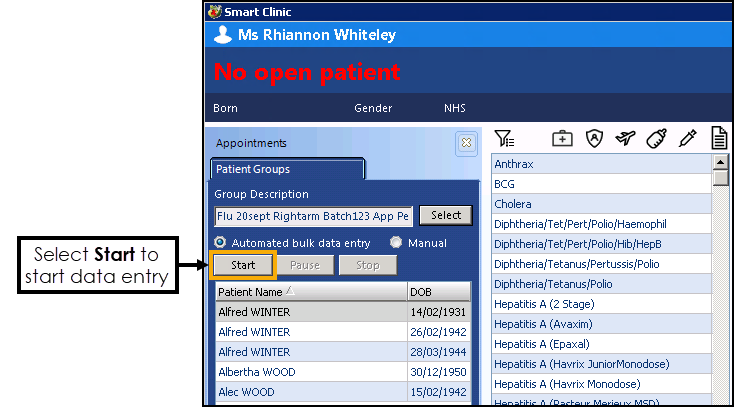
The system starts saving the immunisation data to each patient record in Vision 3. This process may be paused and restarted, or stopped completely if required.
A green tick  displays next to the patient's name once their record is updated.
Please Note:
- Once the process starts, the immunisation details cannot be changed unless you stop the process
- If you use Pause, when you restart, the process continues from where it left off
- Stop clears and resets the whole process, so when you restart, it begins at the first patient in the list