Barcoded Flu Clinic with SMS Invites
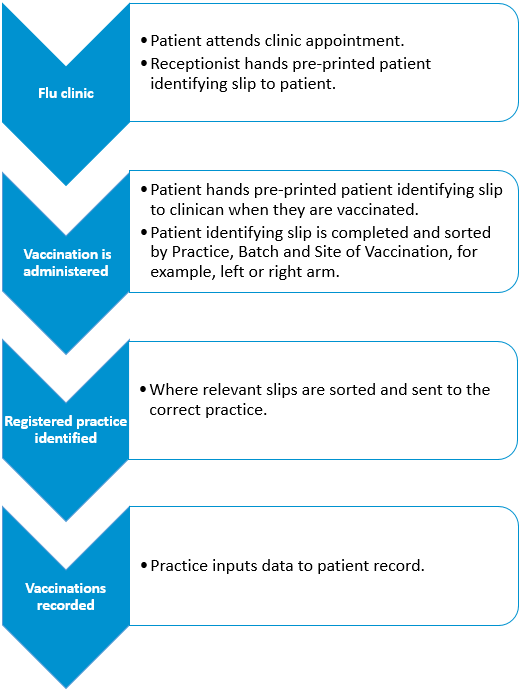
Once you have purchased a barcode scanner, providing a pre-printed patient identifying slip to booked in patients enables you to quickly and easily scan and record who has been vaccinated as part of a clinic. This is particularly useful for off-site clinics, for example, vaccination hubs.
How does it work?
Invite your Patients
- Invite patients to a flu clinic by text message, see Sending SMS Messages.
- Book invited patients into the flu clinic, see Vision 3 Appointments Set Up User Guide or Booking an Appointment with Vision Appointments.
Creating Barcode Slips
To create barcoded slips:
- Download the latest Appointment Wizard excel document, see Appointment Wizard for details.
- Enter the date range of for the flu clinic in FROM and TO:
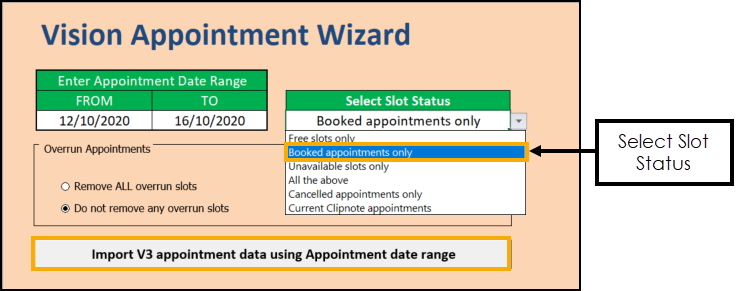
- From Select Slot Status, select Booked appointments only.
- Select Import V3 appointment data using Appointment date range to run the Appointment Wizard. The information displays in the App_Data tab of the spreadsheet:
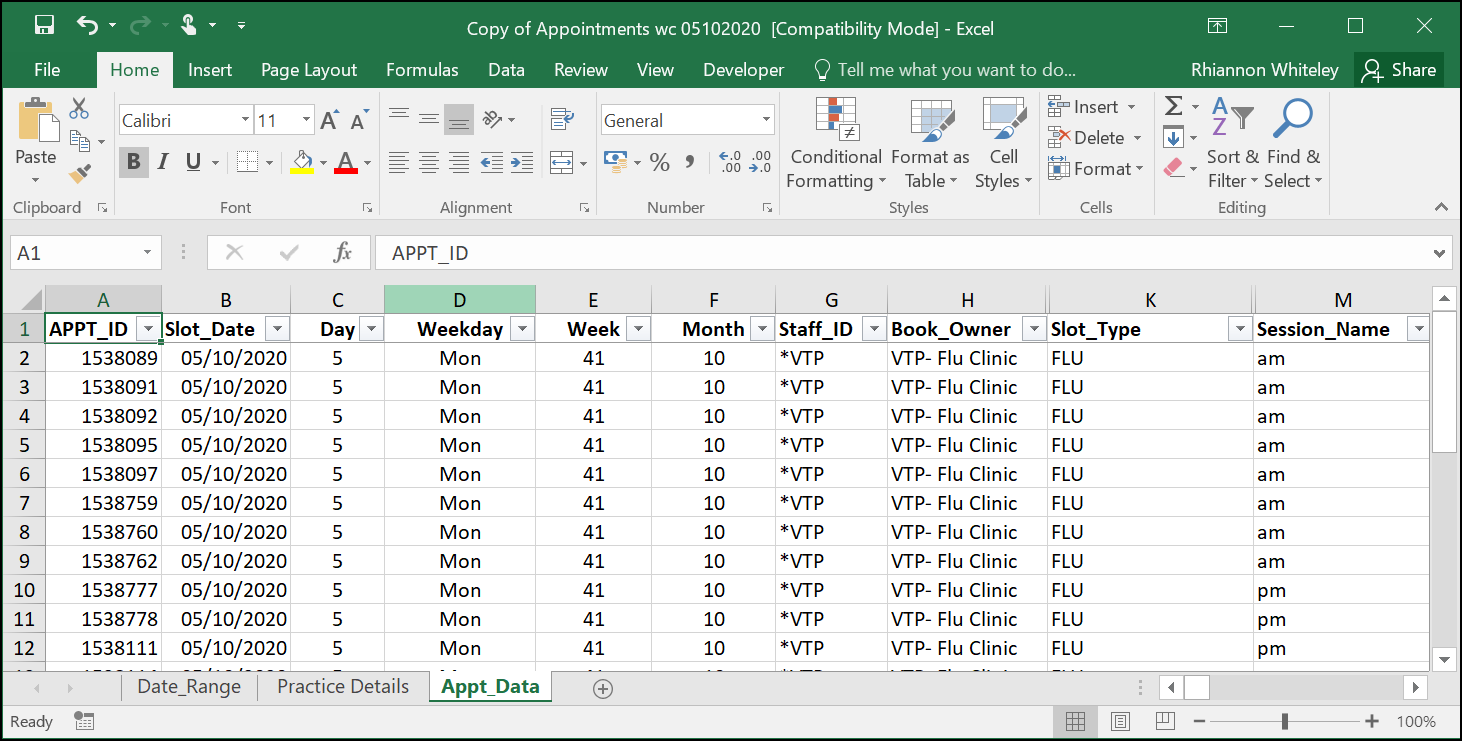
- Save the document locally for use below.
- Open Microsoft Word.
- Select Mailings - Start Mail Merge - Step-by-Step Mail Merge Wizard:
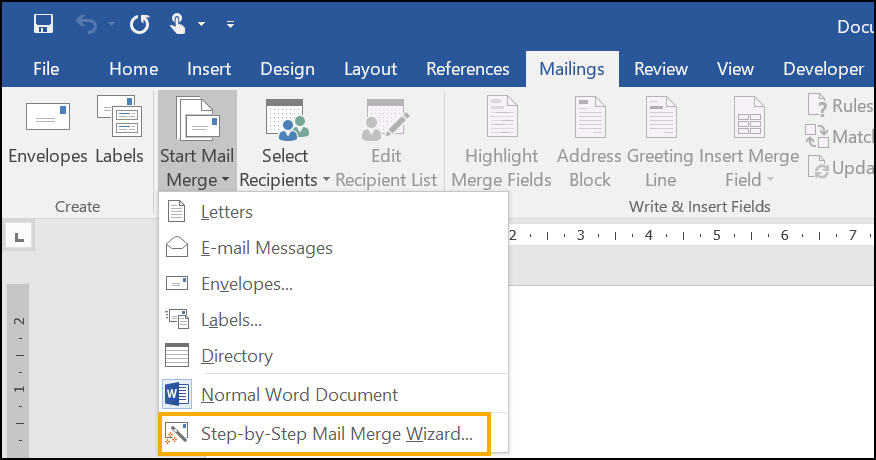
- The Mail Merge wizard displays on the right side of the screen.
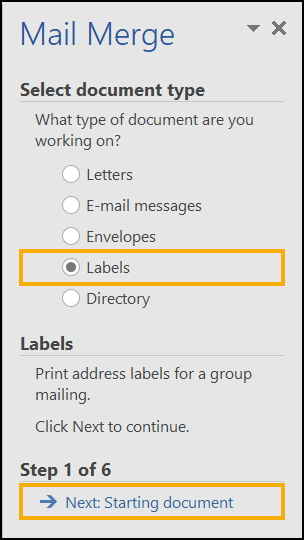
- From Select document type, select Labels.
- Select Next: Starting document:
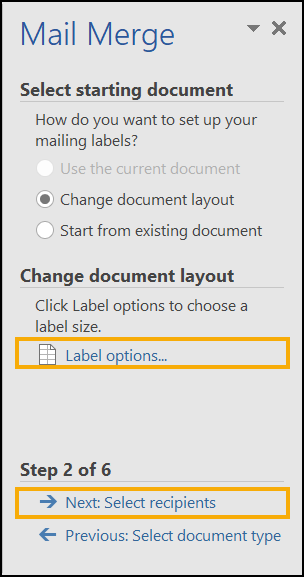
- FromChange document layout, select Label options.
- If you are using labels, select the label vendor and product from the list. If you are printing on paper and cutting into strips select the most appropriate label setup.
- Select Next: Select recipients:
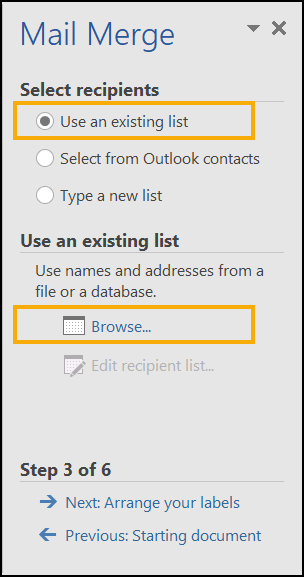
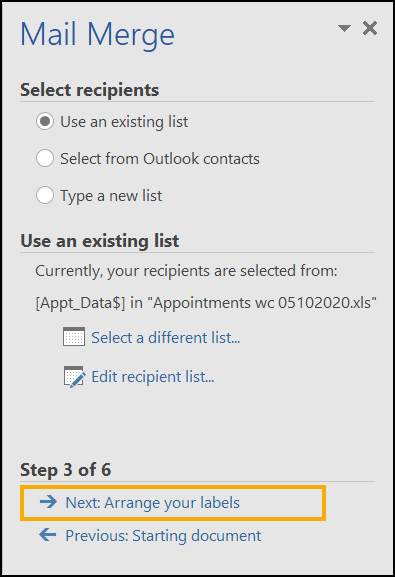
- From Select recipients, select Use an existing list.
- Select Browse to search for the spreadsheet saved above:
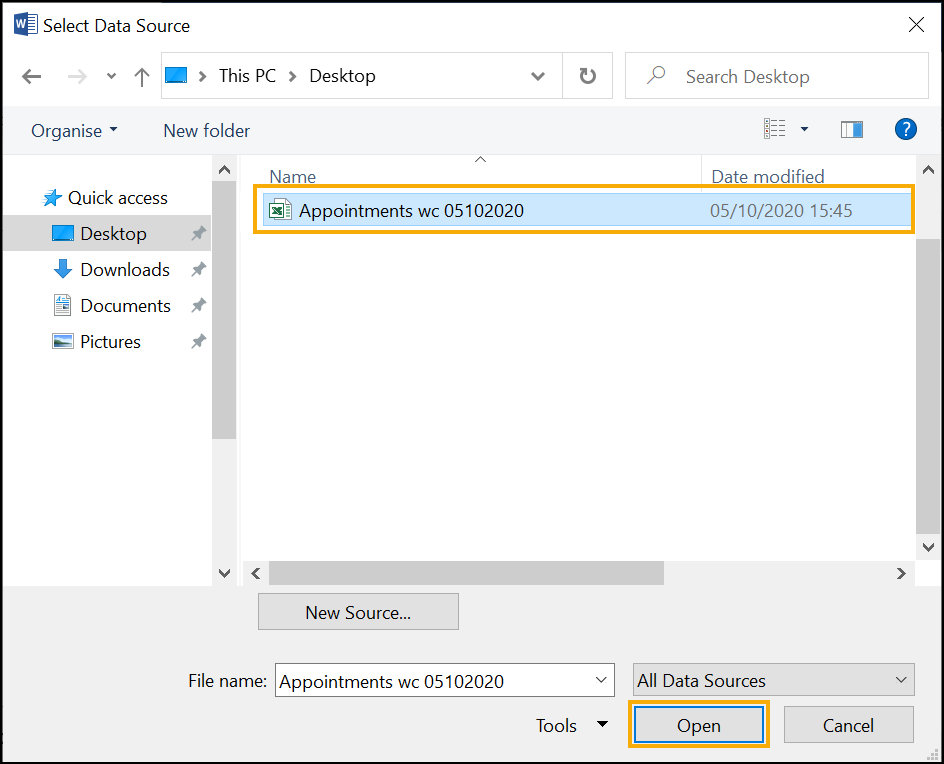
- Highlight the spreadsheet required and select Open:
- From the Select Table screen, select Appt_Data$ and then select OK:

- From the Mail Merge Recipients screen, sort and filter the recipients for the day or book type as required.Training Tip - You can either filter the recipients using the column filters or the refine recipient list options.
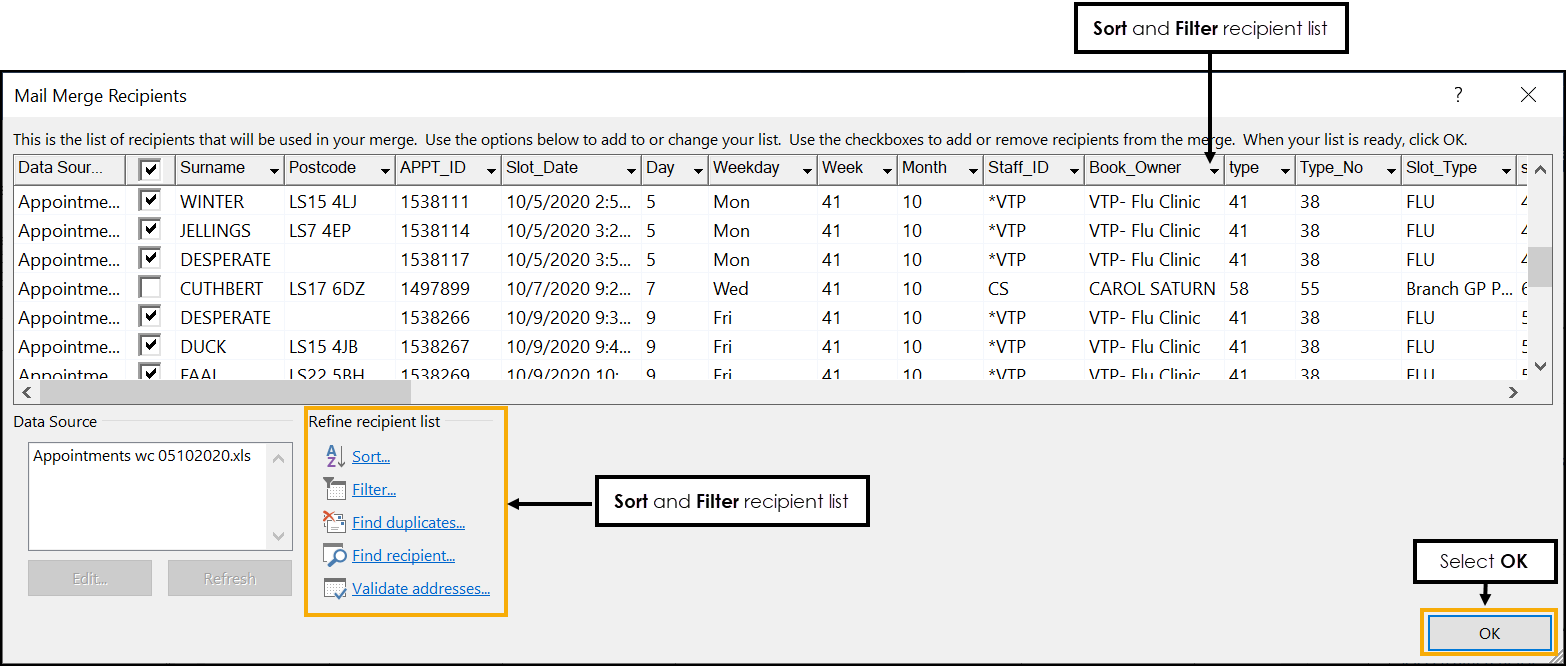
- When the patient list is correct, select OK.
- From the Mail Merge Wizard, select Next: Arrange your labels:
- From Mailings - Insert Merge Field, insert the merge fields along with more text as required to lay out the first label.
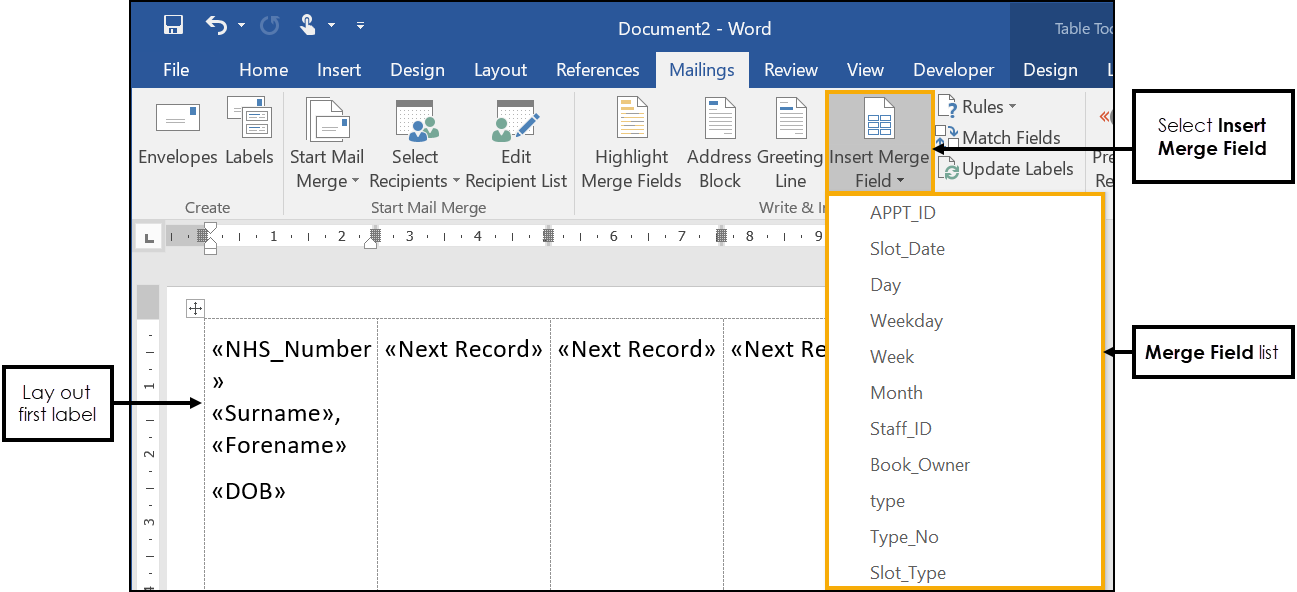 Important – Do not change text within the merge fields.
 - Add an asterisk either side of the merge field with no spaces between, for example *«NHS_Number»*.
- To prevent a blank space from being read as a "return key", add any keyboard character immediately after the last asterisk, *«NHS_Number»*x.
- Highlight the asterisks and merge field but not the additional character, *«NHS_Number»*x, right click the selected text and select Font.

- Change the font to a barcode font. Suitable barcode fonts are:
- IDAutomationHC39M - installed onto Microsoft Word for AEROS users
- free3of9 - on a local desktop only, search for and download from the internet, for example https://www.fontsupply.com/fonts/F/Free3of9.html.
 Note - The resulting barcode before mail merge looks odd due to characters that are not barcode compatible. Once the document is merged the barcode appears as expected.
 - From the Mail Merge Wizard, select Update all labels to replicate the first label to the other labels on the page:

- Select Next: Preview your labels.
- Preview the labels and edit the recipient list as required. For example, you may want to remove patients that do not have a NHS number.
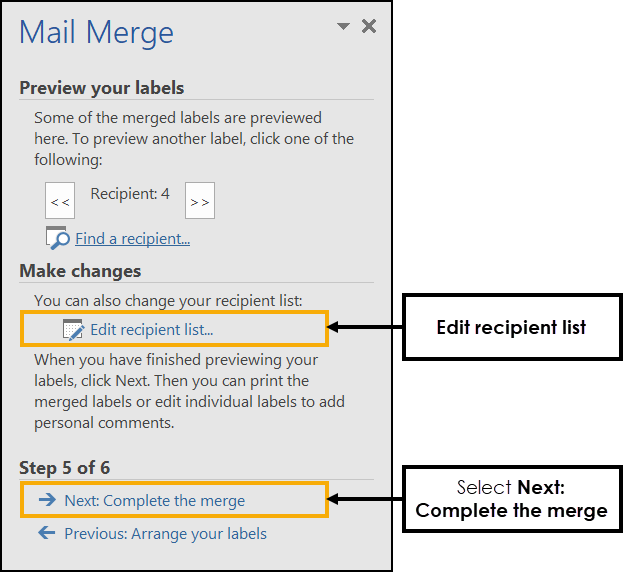
- Once you are happy with the labels and the recipient list select Next: Complete the merge.
- Select Print, set the number of records to print and follow the print setup for the labels selected.

- These slips can be kept at reception ready for the patients to attend the flu clinic.
See here for details on entering the barcoded data.
Note – To print this topic select Print  in the top right corner and follow the on-screen prompts.