Creating your own Patient Record Views
You can create and, if required, share your own Patient Record Views. To create your own view:
-
From Consultation Manager
 , select Consultation - Options - Setup.
 - Select the Patient Record tab.
- Select New.
- The Configure Consultation Framework screen displays:
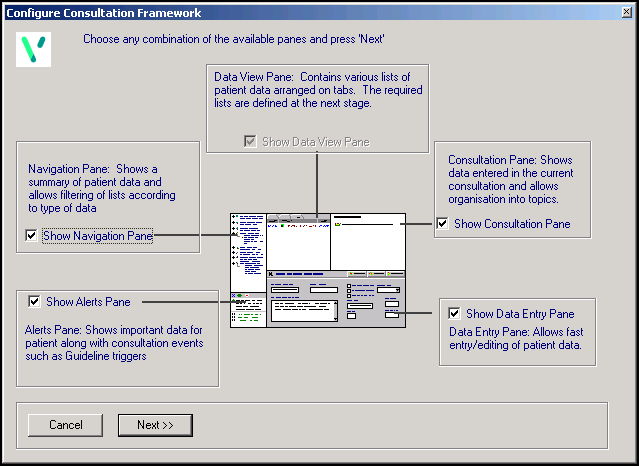
- Tick/Untick the following as required:
- Show Navigation Pane- Tick to display, the navigation pane summarises the patient record.
- Show Alerts Pane - Tick to display, the Alerts pane displays missing, due or overdue data. Minimised triggered Guidelines display under the Alerts pane.
- Data View Pane - The Data View Pane is a list of patient data arranged on tabs, the tabs displayed are defined on the next screen. You cannot remove this section of the screen.
- Consultation Pane - Tick to display the data entered in the current consultation. Useful if you use a problem orientated approach.
- Show Data Entry Pane:
- Tick to display the data entry - Add screen in the bottom section of the screen.
- Untick to display the data entry - Add screen on top of the Patient Record and on some tabs, READ popup does work.
Note - The Patient Select tab does not work if the Data Entry Pane is unticked, so should not be selected as a tab on a view.
- Select Next
 .
. - The Select Data View Pane screen displays:
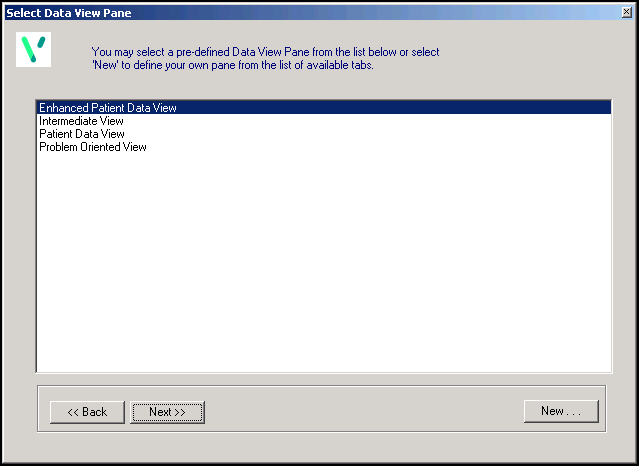
- You can utilise pre-defined Data View Panes for your new view, simply select the view required and select Next ,
or
You can specify the tabs on your view. Select New
 and the Configure Data View Pane screen displays. Highlight the tabs you require from the left column and select Add
  to move them to the right column. Repeat until you have all the tabs required. You can change the order of the tabs by selecting the tab and selecting Move Up
  and Move Down
  as required. Select Next .
 - The Confirm Save screen displays:

Complete as follows:
- Description - Enter a name for this view
- Do you wish to publish this configuration:
- Yes - Select to publish this view and allow other users to use it.
- No - Select to add this to your settings only.
- Select Finish to save and close.
Note - To print this topic select Print  in the top right corner and follow the on-screen prompts.