Assigning a Patient
Mail Manager is designed for the receipt and processing of clinical messages relating to your patients. When Mail Manager receives a message, it usually assigns the patient automatically from the information in the message.
Occasionally, the patient cannot be identified automatically. This may be because the patient does not exist on your system or because the details provided in the message are insufficient or incorrect.
An unassigned patient is highlighted by the supplied name being prefixed with an asterisk:

To assign or re-assign a patient to a message:
- From Mail Manager
 , you can either:
- Right click on an unassigned or unfiled message and select Assign to Patient or Re-Assign to Patient.
- Tick message(s) and select Patient arrow
 - Ticked - Assign to Patient or Re-Assign to Patient.
 - Highlight a message and select Patient arrow - Highlighted - Assign to Patient or Re-Assign to Patient.
- The Assign Patient screen displays:
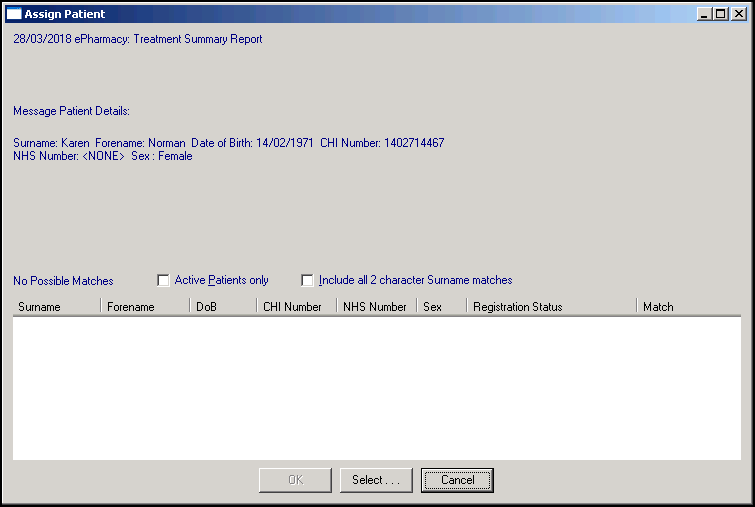
The message details are shown in the top pane, a list of possible matches to the Vision 3 patient register is shown in the bottom pane. The Match column lists by possible matches as follows:
- A match on NHS number. If there is a match on NHS number and all the other fields, you are warned when selecting another patient and strongly discouraged from doing so.
- A good match (at least the first two characters) on Surname and Forename and an exact match for both sex and date of birth.
- An exact match on date of birth.
- A good match (at least the first two characters) on Surname and Forename and an exact match for one or either of sex or date of birth.
- A good match (at least the first two characters) on Surname and Forename.
- A good match (at least the first two characters) on Surname.Note - You can sort the columns by selecting the column header, so if, for instance, you are sure that Olive Beer is female, you can sort the ‘matched on sex’ column so as to demote all male patients that may appear as possible matches.
You must then either:
- Select a patient from the offered match list, or
- Choose Select to find the patient you require in the usual way, see Selecting a Patient for details if required.Note - When finding a patient, if you have Active Patients Only selected, only active patients display, remove this tick to display all patients. If you select a transferred out patient, you are warned that the patient is no longer active. You can assign and file to the correct patient anyway. It is your clinical responsibility to forward any result for a transferred out patient to the patient's new practice, in paper format or electronically, for the benefit of the patient's new clinician.
- Select OK once the required patient is selected.
All assignment and reassignment of patients are fully audited.