Re-Registration
Important - For practices with a hosted server, for example AEROS, you must watch the videos on your local desktop. To do this copy and paste the url for this web page into your local browser. Local health board restrictions may also affect access.
Re-Registering a Patient (1.46)
If a patient has been registered to your practice in the past and they currently have a registration status of Transferred out you can re-register the patient. They may have:
- Previously transferred out and now want to return to your practice permanently, or as a temporary resident,
- Been a short stay temporary resident, but they now want to change to a long stay, see Editing a Temporary Resident's Length of Stay for further details
- Had another registration status, for example an expired temporary resident.
To re-register a patient:
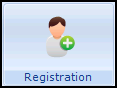
- From the Vision 3 front screen, select Registration
 .
. - Select the patient required, remember to remove the tick from Active Patients Only on the Patient Select screen so all patients list.Note - If the patient is not found on the patient list, then you can add them as usual without re-registering.
- The message 'This patient is no longer active - do you wish to continue?' may display, select Yes to continue.
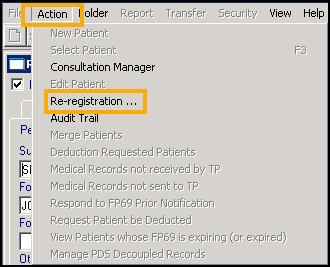
- With the patient's details on the screen, select Action - Re-registration:
- The Registration - Personal Details screen displays, check the details and update where necessary:
- Registration status - Defaults to Applied, update to Temporary if appropriate.
- Date Applied/Date Accepted - For patients re-registering, the applied date defaults to today and displays in red, previous applied dates can be viewed from the Audit Trail.
Training Tip - Press Tab on your keyboard to move through the form, do not press Enter until you reach the bottom of the form.See Registration - Personal Details (initial) for details. - Complete all the remaining screens as required in the usual way.See Adding a New Patient for details.
- Once all the details are correct, select OK.
Note - To print this topic select Print  in the top right corner and follow the on-screen prompts.