Vision+ Forward Dating Explained
The Forward Dating tab within the Settings screen provides three different options for forward dating of indicators. These options change the information that displays in the Contract Indicators, Contract Templates and Patient Target lists, the reference date is clearly shown on these screens.
Note - For each new QOF/QAIF year Vision+ automatically reverts Forward Dating back to None (today's date). Depending on your practice preference you may want to change this per individual user login.
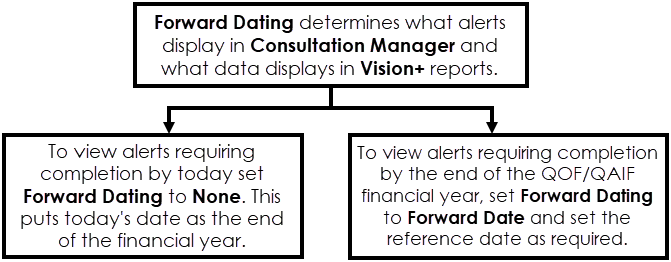
The diagram below explains the settings you may initially require for forward dating:
To access the Vision+ Settings screen:
- From the Windows Notification Area, right click Vision+
 and select Settings:
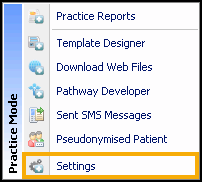 Note - To access Settings, you must not have a patient open in Consultation Manager.
 - The Settings screen displays, select Forward Dating:
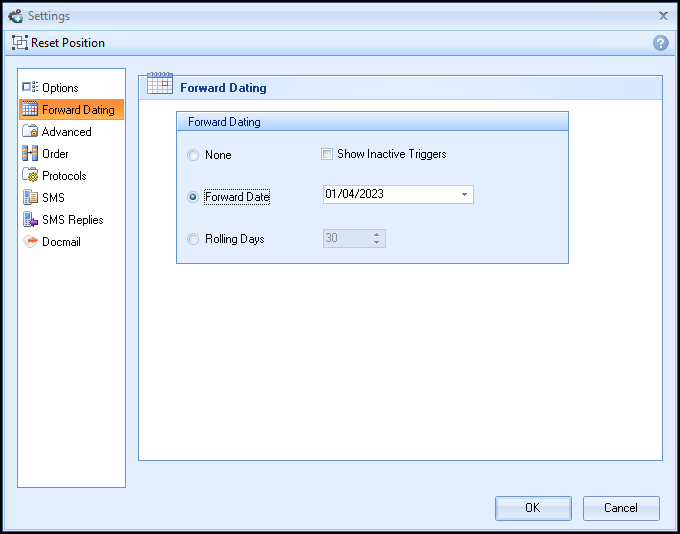
- To change the forward dating, select from the following options:
- None - Select to display only those indicators requiring completion as of today's date display.
- Forward Date - Select to display those indicators that have already been completed as of today's date, but must be re-recorded before a specified reference date. You can set this date using the date picker or by typing in a date.
- Rolling Days - Select to display those indicators that have already been completed as of today's date, but must be re-recorded within a specific number of days ahead. You can set the number of days using Days.Note - If you choose Forward Date or Rolling Days, you can select Show Inactive Triggers to display those items that will need recording in the future, but cannot be recorded within the specified time period. Depending on which option you have selected, the indicators display in different colours on the other screens. For more information on the colour-coding of indicators, see Colour-Coding of Contract Indicators.
- Select OK to save.
Note - To print this topic select Print  in the top right corner and follow the on-screen prompts.