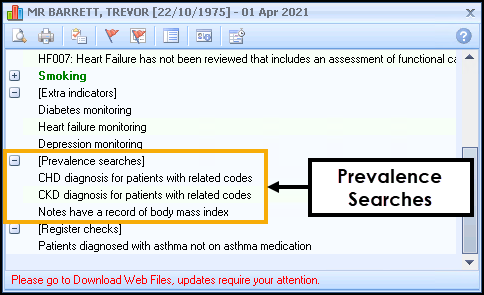
Prevalence Searches
Vision+ provides a number of data tidy searches which allow the practice to maintain accurate disease registers. Prevalence Searches look for patients who have been potentially overlooked and should be on a QOF/QAIF disease register:
-
If the patient should be on a disease register then the clinician can add the relevant code to add the patient to the register.
-
If the patient should not be on the QOF/QAIF disease register then they remain on the Prevalence Searches list.
An example of this is a patient has Asthma related clinical terms but no diagnosis recorded. A clinician can pick this up through the Prevalence Search template and add an Asthma diagnosis code if required.
As with other templates, Alert Indicators are available, and patients can be sent letters or SMS from Practice Reports.
Accessing the Prevalence Searches Template
To access the Prevalence Searches template:
-
From the Windows Notification Area, right click Vision+
 and select QOF Templates:
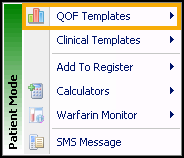
-
Select Prevalence Searches.
-
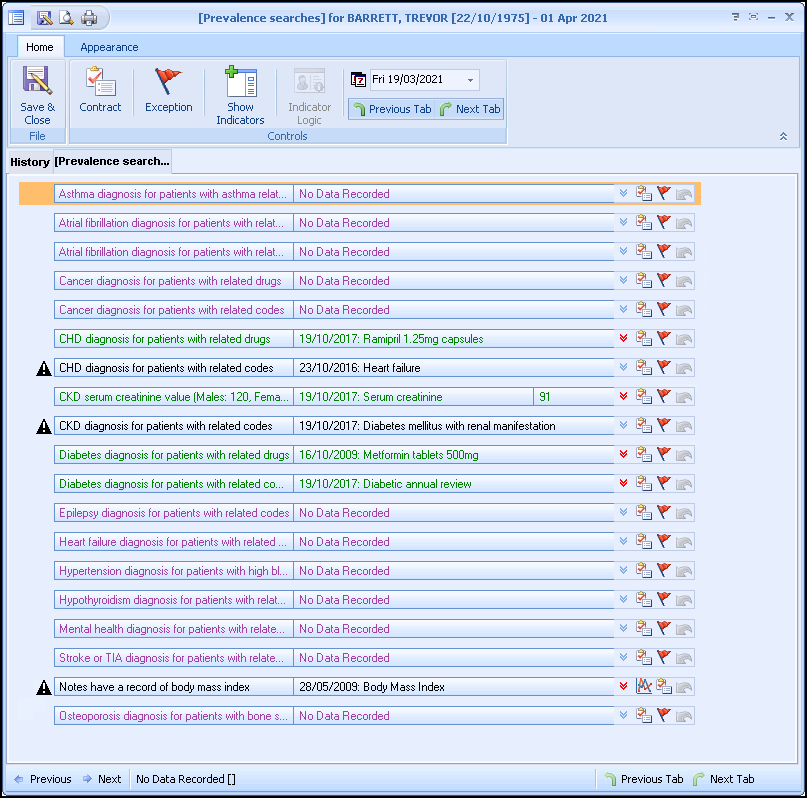
The Prevalence Searches Template displays:
-
Any relevant patient information displays.
-
You can update any indicator as follows:
- History:
 A blue arrow displays if the row contains none or one relevant clinical term.
  A red arrow displays if the row contains more than one relevant clinical term.
To close the history screen, select Close
 . The window can also be resized by selecting and dragging Resize
  .
.
-
 BMI - Opens the BMI Calculator, see BMI Calculator for details.
 -
 Contract - Add a code for the selected indicator to add the patient to the register, see below.
 -
 Exception - Add an exception code for the selected indicator.
 -
 Undo Last Entry - Select to delete the clinical term previously entered on that line during the current session.
- History:
- Selecting Contract displays the Codeset Codes screen with codes for the selected indicator:
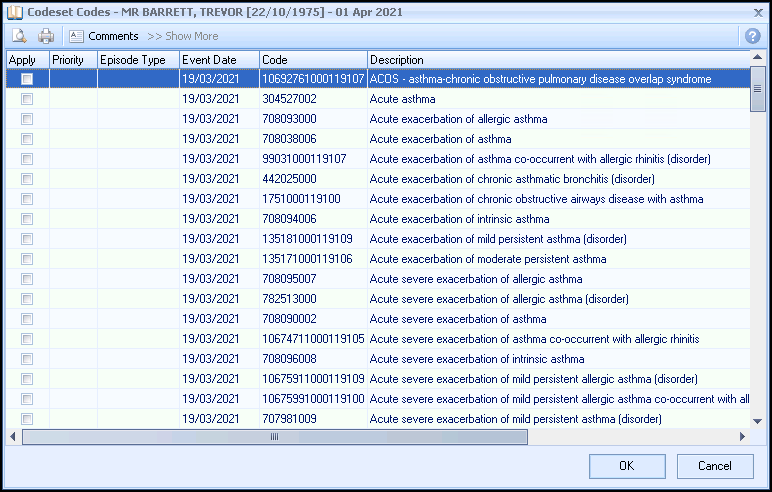
- Select Apply. You can also select a priority and enter freetext notes.
- Select OK to save the data or Cancel to return to the template.
