Booking an Appointment
Booking an Appointment (1.48)
To book an appointment:
- From the Reception View select a free slot, you can use Find a Free Slot
 to do this.
 - The booking form displays and the appointment slot displays as Locked
 for other users:Training Tip - Local Practice next to an appointment, indicates this is at the practice you are logged into, it is not an indication of branch or main site.
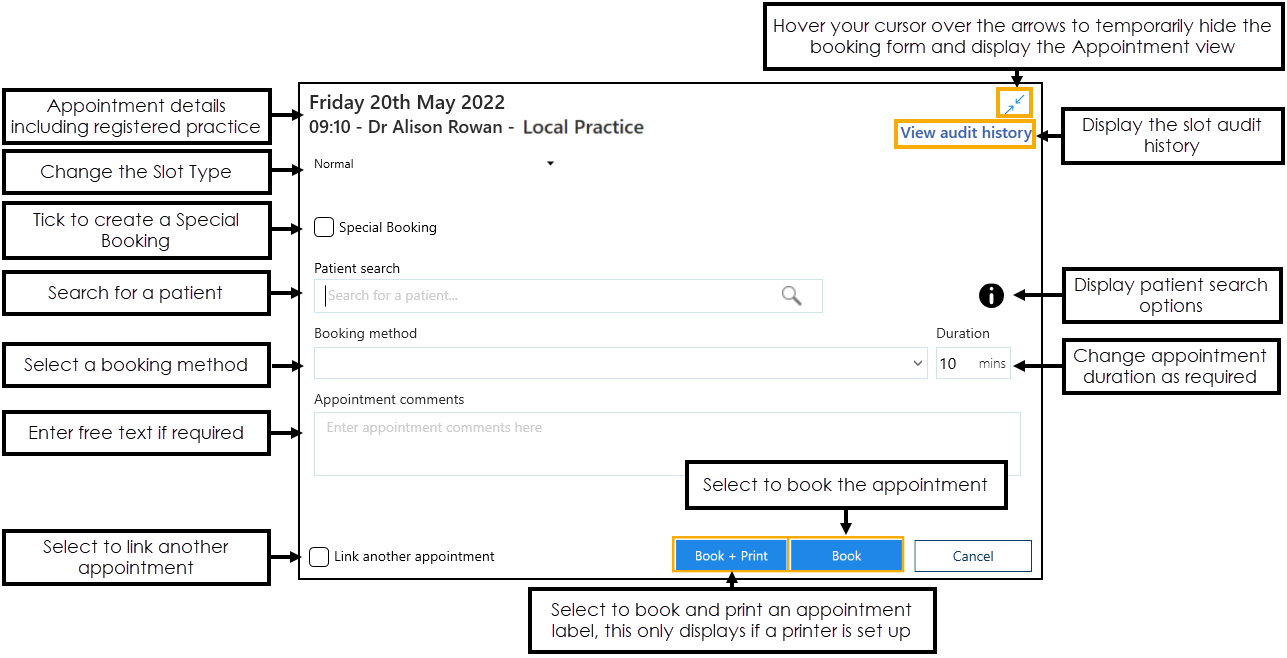 Training Tip - Hover the mouse cursor over the Hide Booking Form option
 to temporarily hide the booking form and display the main appointment view behind. Move the mouse again to return to the booking form and complete.
 -
In Patient search, enter the patient's surname and/or date of birth and select Search
 or press Enter on the keyboard:
 Patient Search Criteria
- Surname
- Surname, Forename
- Surname Date of Birth (full or partial)
- Date of Birth in full
- Surname, forename Date of Birth (full or partial)
The full date of birth can be entered as:
- DDMMYY for example, 9th December 1980 would be 091280.
Note - This format is only valid for patients born within the last 100 years.- DDMMYYYY for example, 9th December 1980 would be 09121980.
- DDMMMYYYY for example, 9th December 1980 would be 09DEC1980.
The partial date of birth can be entered as:
- YYYY (1980)
- MMYYYY (091980)
- MMMYYYY (DEC1980)
-
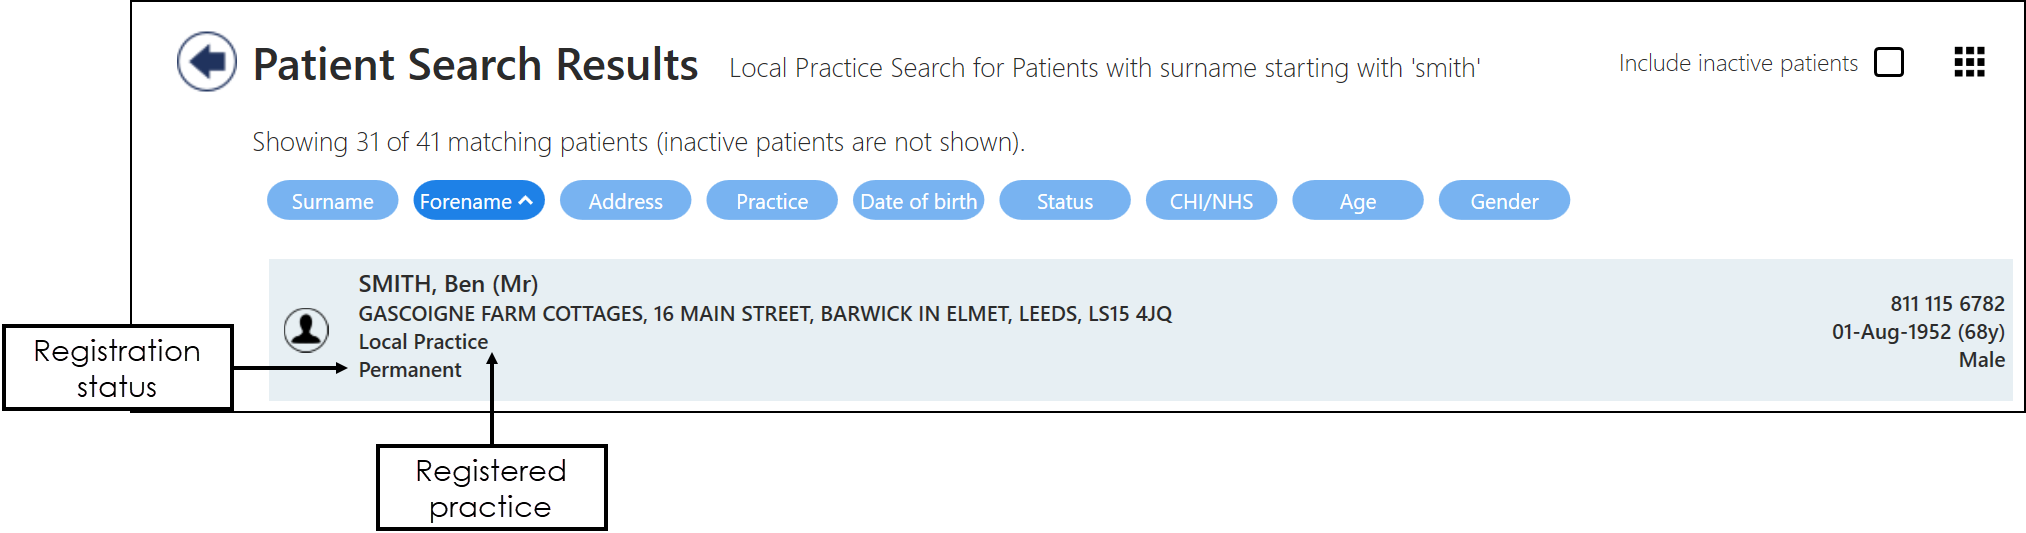
The Patient Search Results screen displays, filter the results if necessary and select the patient you require:
The booking form displays:
 Note - A warning displays if you are booking an appointment slot that has a restriction, see Appointments Restrictions for more information.
Complete as required:
- Slot Type - Change the slot type if necessary.
Note - You can only change a slot to a Non-bookable or Web bookable slot type from the Reception View and Weekly View screens. See Changing Slot Types for details.Important - To facilitate reporting on vaccination appointments any COVID vaccination appointment slots should have a Slot Type of COVID VACS. This is essential in England and recommended elsewhere to help manage your appointment books. See Changing Slot Types for more information.
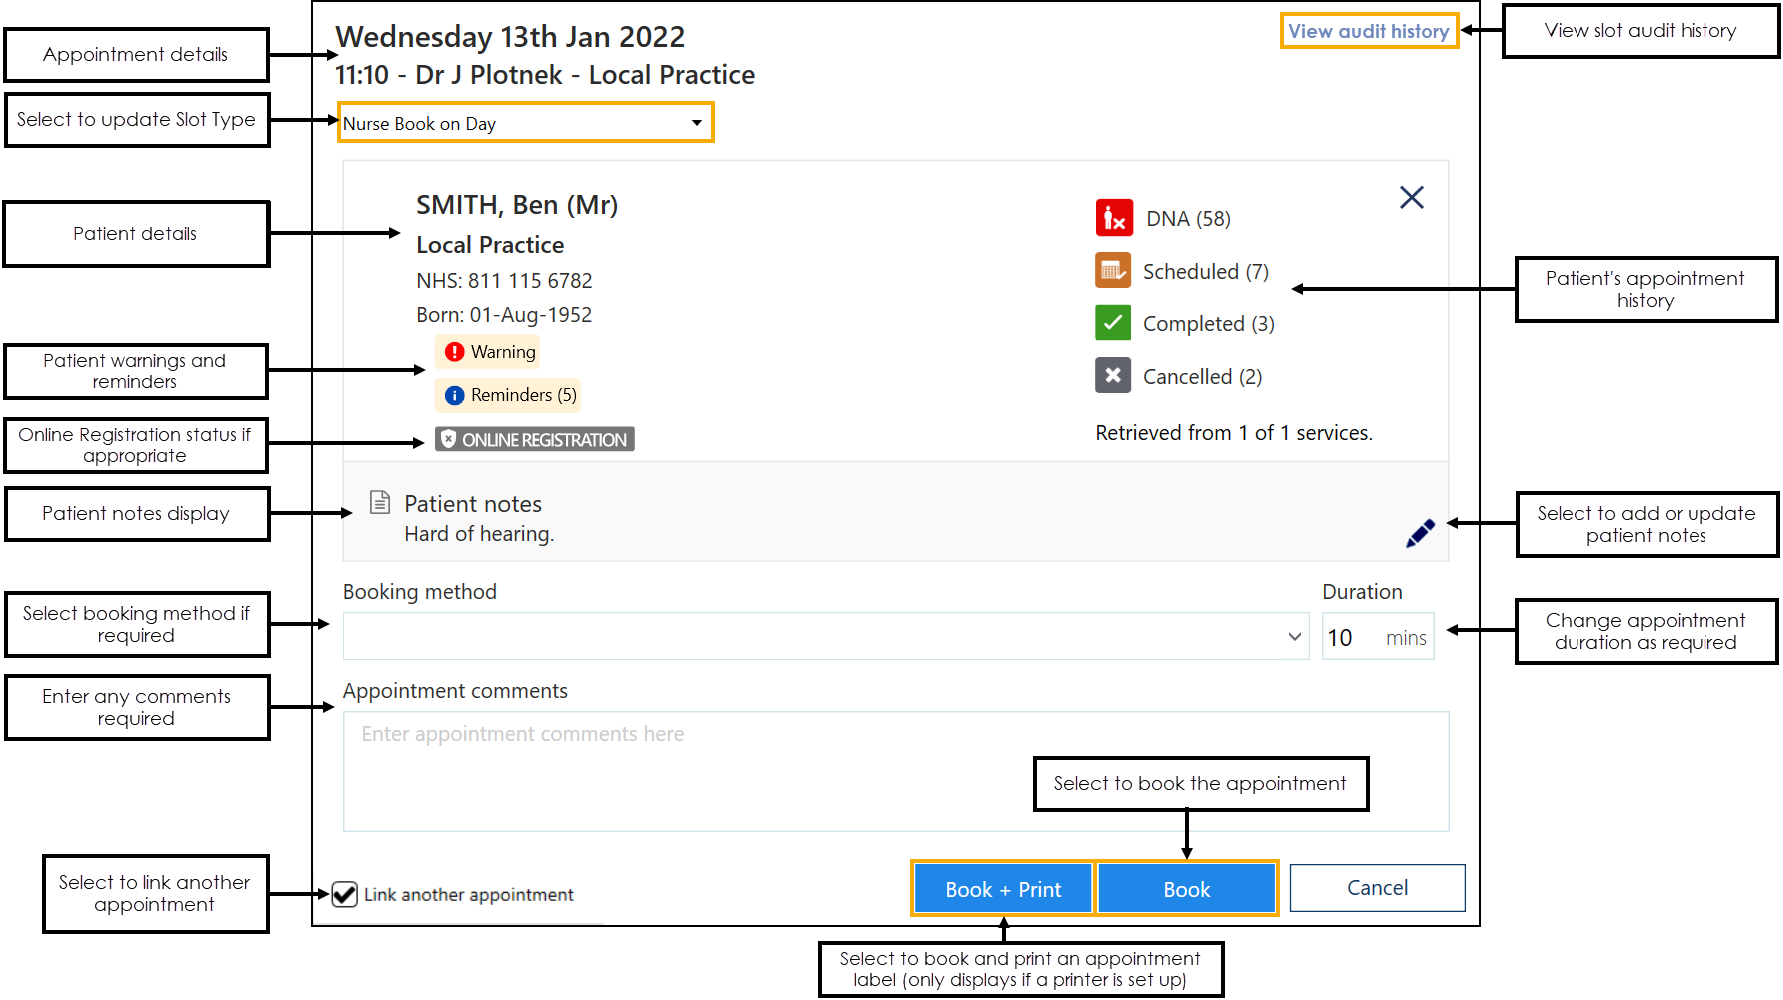
- History - A summary of the selected patient's appointment history displays, select to view the detail if required:
 DNA - Appointments the patient did not attend.
  Scheduled - Appointments scheduled in the future.
 Completed - Appointments previously attended.
  Cancelled - Appointments that have been cancelled.
See Preferences - Patient Data for set up details. - Online Registration - Displays if a patient is not registered for Online Services.
Select ONLINE REGISTRATION
 to register the patient for Online Services in Vision 3. Important - This is only available if you have accessed Appointments from Vision 3 and you have access rights to Registration for registration records in Vision 3. See Adding and removing users and groups from Vision functions in the Management Tools Help Centre for more details.See Registering Patients for Online Services in the Patient Online Services Help Centre for more information.
 - Patient Note - Displays any notes recorded about this patient, see Patient Notes for details if required.
- Booking Method - Optional, select from the available list if required.
- Duration - Change the expected duration of the appointment if required.
- Appointment comments - Add any comments for this appointment if appropriate.
- Link another appointment - Select to link another appointment, see Linking Appointments for details if required.
- Slot Type - Change the slot type if necessary.
- Select either Book and Print
 or Book
  as appropriate.
A message displays confirming the booking:
