
|
|
|
|
|
Signing Prescriptions - Overview for Prescribers
The steps below provide an overview for prescribers for digitally signing prescriptions after they have been issued from Consultation Manager. You have the option to sign now or sign later. See Prescription Manager and EPS for more detailed information.
- From Consultation Manager, select the patient.
- Select the Therapy tab and add or issue the therapy as usual. See Select Drug List for icon changes.
- Press F9 to display PrescriptionManager. Check the details in this screen.
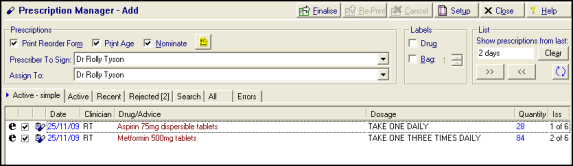
- It is advised that you also check the type of prescription that has been generated:
 Electronic signed electronic message. The message is the legal entity.
 Electronic +Token - For if the patient requires paper or Repeat Dispensed items. The message is the legal entity.
 Dual - a single ETP message and dual signed script/token. Paper is the legal entity.
 Paper (signed script only, eg FP10) - this is the only icon you see if ETP is not enabled. Paper is the legal entity.
- Press Finalise.
 Note – Only prescribers are able to electronically sign prescriptions. Admin staff can issue and finalise prescriptions but these are forwarded to the allocated Prescriber To Sign and/or Assigned To clinician.
Sign Now
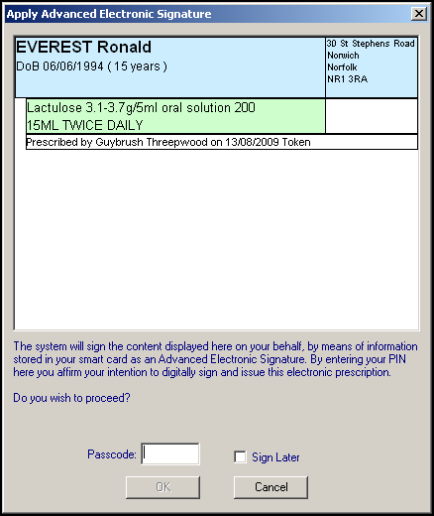
Next, you are prompted with the Apply Advanced Electronic Signature window. Review the patient and drug details, then enter your Smartcard passcode to sign the prescription now.
Sign Later
Alternatively, instead of entering your Passcode to sign now, you can tick Sign Later and select OK. This does not send the prescription now, but adds the prescription to the All Prescriptions screen where you can sign and/or review your prescriptions in bulk at a later date.

- Select OK to continue. The prescription message is sent to the Spine.

