
Creating an Announcement
To create an Announcement:
- From within the Tasks app, select Announcements.
- Select New announcement
 .
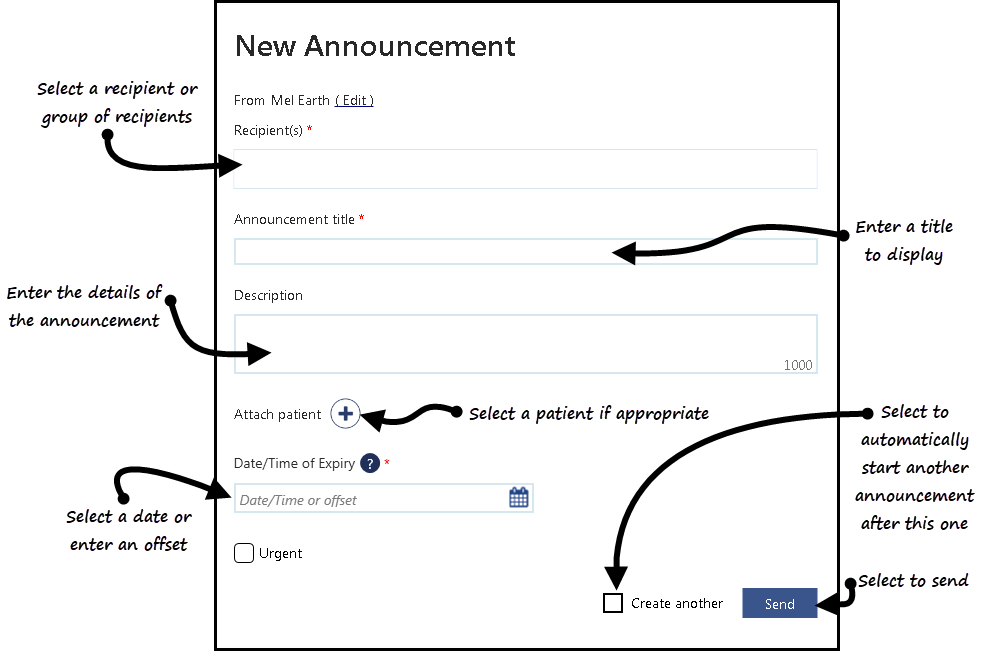
. - The New Announcement screen is displayed:
- Complete as required:
-
From - (optional) If you are creating this announcement on behalf of a group of staff you are a member of, select Edit and select the appropriate group.
-
Recipient(s) - Select the recipient of this announcement, this can be one or more individual members of staff, or a staff group, simply start typing and a smart list is displayed to select from.
-
Announcement title - Enter the short description of the announcement that appears in the Announcement list of the recipient, up to 30 characters.
-
Description - Enter a full description for the announcement , up to 250 characters.
-
Attach patient - If appropriate, select Attach patient
 to select a patient:
-
The Vision side bar is displayed, type the patient name (either in full or part), select Search
 and a smart list of matching patients is displayed. Select Attach > next to the patient required.
  Important - When generating an announcement in relation to a deceased patient, remember to check you have attached the correct patient.
-
- Date/Time of Expiry - Select a date that this announcement should expire, either select the Calendar
 and select a date and/or time or by using the usual t=today, d=days, w=weeks, m=months or y=years short hand eg 2d = 2 days.
 - Urgent - Tick if this announcement should be marked as urgent.
-
Select Send to save and send the announcement.
- An 'Announcement created successfully' message is briefly displayed at the bottom of your screen.
View the following video to see an Announcement being created. For further videos see Video Tutorials.
| Creating an Appointment (1.05) |

