Exporting Data
You can select to export report data directly from the Reports screen.
Training Tip - You can also send reports by email, see Sending a Report by Email for details.
- Once you have selected the criteria for your report see Registration Links Reports for details, select Process.
- From Report Output, select Windows to display the report, see Registration Links Reports and Report Output for details.
- Select Export
 from the toolbar options and the Export screen displays:
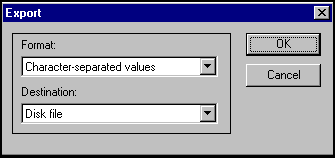
- You may see a message about setting a default Mail client. You need to do this later if you want to send data by e-mail, but if you are only exporting, select OK.
- Complete as required:
- Format - Select the format for your new file.
- Destination - Select a destination for your new file.
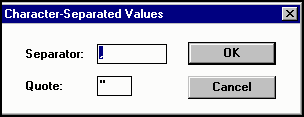
- You may be prompted for further options, such as the format of Numbers and Dates, if for example, you have chosen tab separated; or the separator options. In this case, if you want these the same as the report, check the boxes. Select OK:

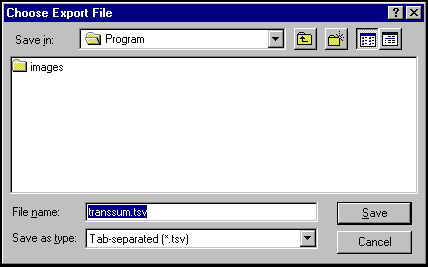
- If you chose the Export Data option, the Choose Export File screen displayed - the default directory is \EXTRACT. Select OK or select another directory:
- Select OK to start processing; a progress bar displays.
- When finished, the report is re-displayed on screen. Select Close to exit.
You can now find your file in the directory you chose.
Note - To print this topic select Print  in the top right corner and follow the on-screen prompts.