Adding a Referral - England
To add a referral:
- From Consultation Manager
 , select the patient required and start a consultation if required.
 - Select Add - Referral, remember you can press Alt+A then Alt+F on your keyboard.
- Select either:
- Referrals - The Referral - Add screen displays.
- From Default - The Select Default screen displays, select the Default referral required, see Setting Up Default Referrals and Requests for details.
- Referral
 , or
, or - Drag a medical history entry on to the bow-tie on the floating toolbar:
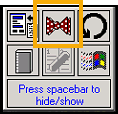
- The Referral - Add screen displays:
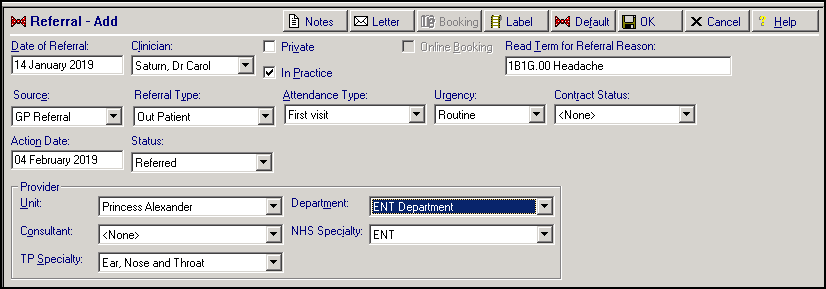
Complete as follows:
- Date of Referral - Defaults to today's date, update as required.
- Clinician - Defaults to the staff member or GP signed on for the current session, update as required.
- Private - Defaults to unticked, tick if you are recording a private referral.
- In Practice - Ticked by default, remove tick to record referral was recorded out of the practice.
- Online Booking - Tick to access the eReferral Services web page, make an appointment request or booking and allocate a unique booking reference number (UBRN). This is only enabled if you are logged on using your Smartcard. Once you tick Online Booking, the 'Before invoking the online booking process, it is essential to ensure that patient demographics are correct. If you think these details may be incorrect, press Cancel and check them.' message displays. Select Continue.
- Read Term for Referral Reason - Mandatory for an eBooking, but it can be added either before or after the e-Referral process. Select a Read code in the usual way, see Finding a Read Code for details.
- Source - Select as appropriate.
- Referral Type - Select from the list available as appropriate.
- Attendance Type - Select as appropriate.
- Urgency - Select as appropriate, Urgency is updated to <None> if you select Online Booking, update before selecting OK. The Urgency is then copied to the e-Referral Service.
- Contract Status - Select if required.
- Action Date - The date by which you would expect treatment to have started. Enter a time period here, for example, 7D for seven days, or 3M for three months. Action dates can be searched on, there are no actions triggered once overdue.
- Status - Select if required.
- Booking Reference - Completes automatically with the UBRN (unique booking reference number).
- Unit - Leave blank as this is selected from the e-Referral screen.
- Department - Leave blank as this is selected from the e-Referral screen.
- Consultant - Leave blank as this is selected from the e-Referral screen.
- NHS Specialty - Leave blank as this is selected from the e-Referral screen, you can analyse referrals by specialty on the Referrals Report.
- TP Specialty - Select as required.
Provider details are set up from Control Panel, see Add Hospital or NHS Trust in the Management Tools Help Centre for further details.- Notes
 - Select to add free text if required, text can be copied into Notes by pressing Ctl+C and then pasted using Ctl+V on your keyboard. To make an eReferral Advice and Guidance Request, enter 'Advice Only'.
 - Letter
 - Select to create a referral letter, see Generating a Referral/Request Letter for details.
 - Label
 - Select to print a label for this referral, check the number of labels is correct and select OK, see Specimen Labels in the Vision 3 Front Screen Help Centre for design details.
 - Default
 - Select to use or set up a default referral, see Setting Up Default Referrals and Requests for details.
- Select eBooking

- The e-Referral service launches and the Service Search Criteria screen displays with your patient selected. Note - A unique booking reference number (UBRN) is allocated instantly. If you close the e-Referral screen at this point, the UBRN automatically completes in Referral - Add, and you must select OK and then Send Later. An admin member of staff can return to edit and complete the referral later.
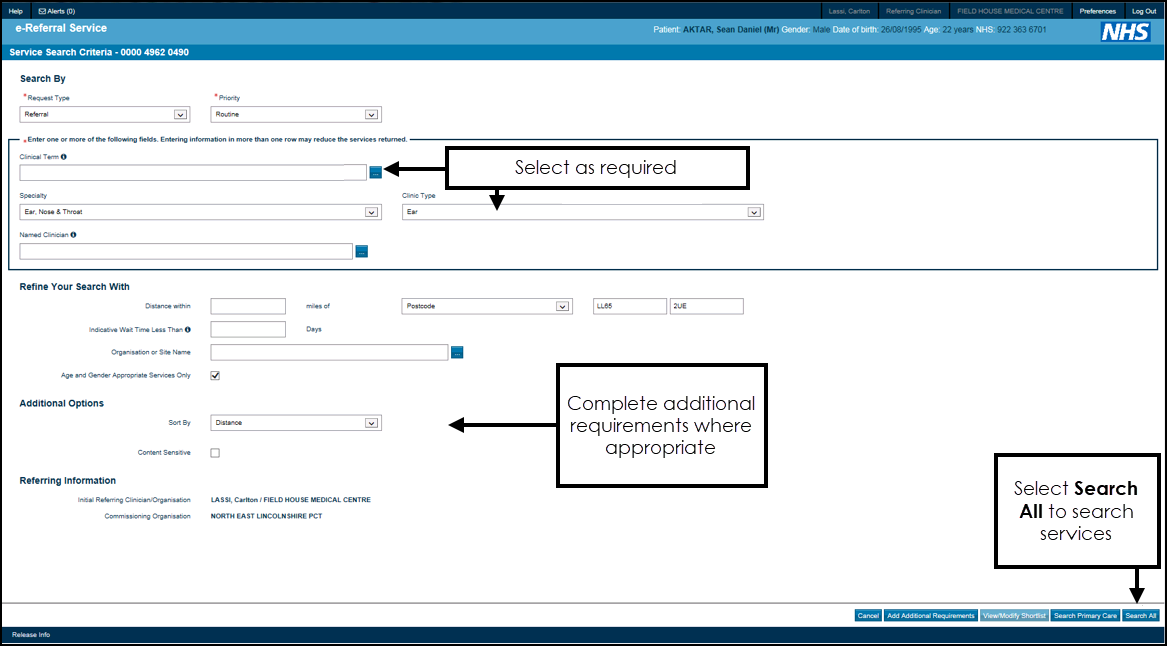
- Select the Speciality and Clinic Type for the available lists and refine any other details as required.
- Select Search All.
- Available services that match your criteria display, tick service(s) that meet your requirements and then select Appointment Search:
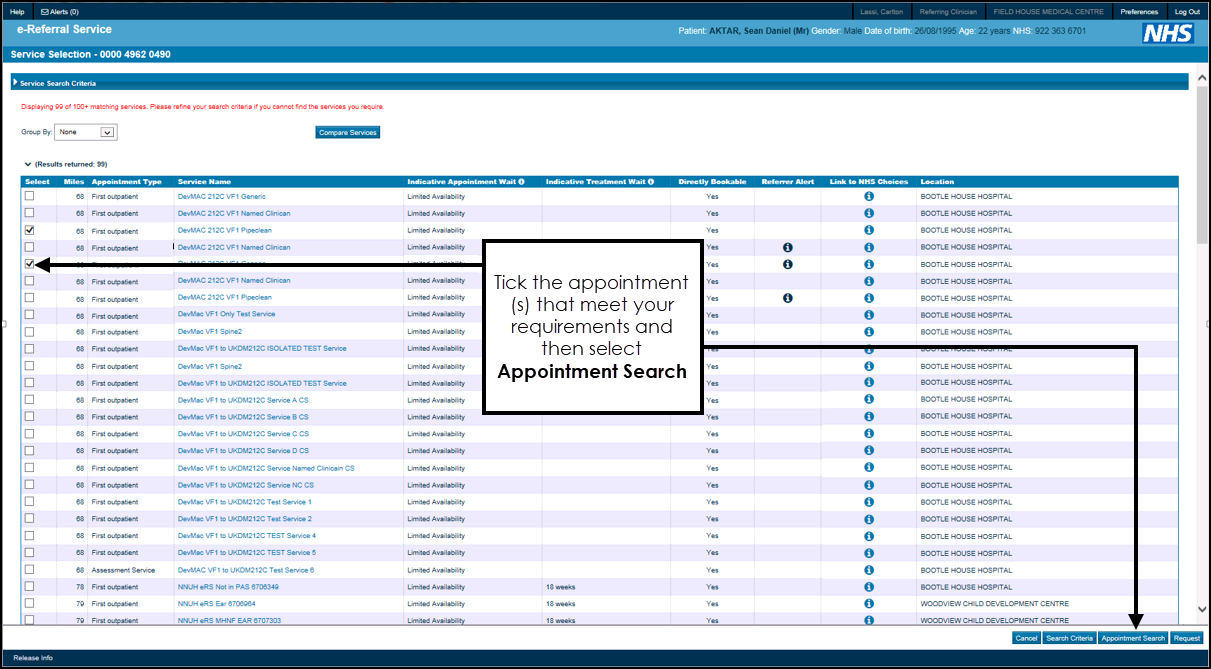
- Available appointments display, untick appointments that do not meet your requirements and then select Continue with selected services.
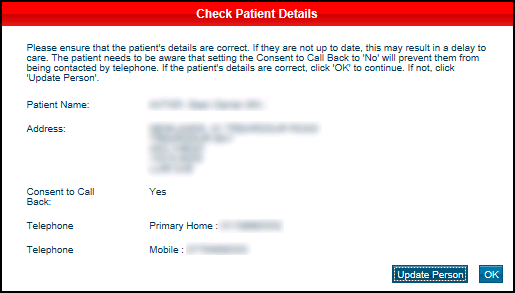
- The Check Patient Details screen displays, check the details and then either select Update Person or OK as appropriate:
-
The confirmation screen displays, select Submit.
-
Finally, select Print to print the letter for the patient.
Important - As this service is updated frequently, you should refer to the e-Referral training guides which give the latest features and functions for an e-Referral http://content.digital.nhs.uk/referrals/referrer/training - Once you have completed either the Appointment Request or Booking, select Close to return to the Vision 3 Referrals - Add screen and select OK.
On accepting an e-Referral, the Referral Message Digest (RMD) automatically appears as a tab in the consultation pane, see Referral Message Digest for details.
Note - To send a referral letter, you must have completed an appointment request, but you do not have to have made a booking of date and time. See also "Send an electronic referral letter on behalf of your GP by admin staff"
Training Tip - From the Journal or Filtered tabs, select More… to view the details of a referral.
Note - To print this topic select Print  in the top right corner and follow the on-screen prompts.