
Bulk Signing - Overview
The Authorised tab lists patients and prescriptions which have been marked for signing later. This tab is accessible to prescribers only and it is advised that you check this at the end of each surgery session. From here you can review and sign prescriptions individual or multiple prescriptions.
To process your prescriptions:
- From Consultation Manager, select
 .
. - List All Prescriptions icon (you do not have to have a patient selected to access this screen).
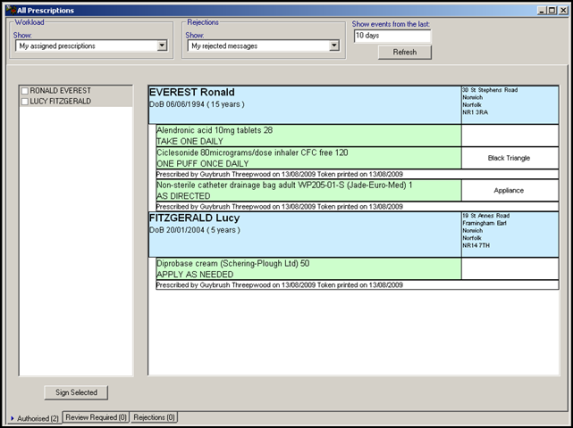
- Select the Authorised tab to display unsigned prescriptions assigned to you in the last 10 days (depending on your filter settings).
- Select the required patients in the list, their demographics and prescription details are listed in the display screen.
- When you have checked each prescription (you must make sure you scroll down to the bottom of the list), select Sign Selected.
- You are prompted to enter your Smartcard passcode.
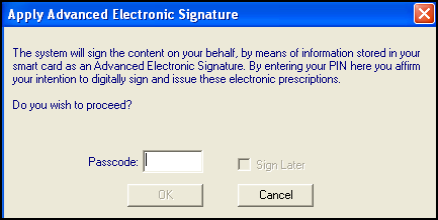
- Enter your passcode and select OK.
- Vision then starts to digitally sign and send the prescriptions for the selected patients. The following screen displays whilst this is happening and shows the patient and prescription details as they are being processed:
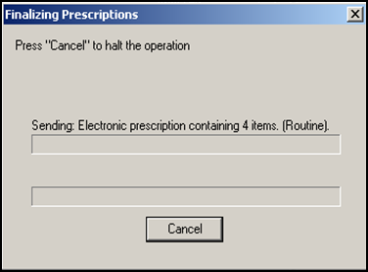
Note – If you select Cancel to halt the operation, the process is aborted after the current prescription is processed and no further prescriptions are sent.
- The prescriptions that have just been signed are now cleared from this view.
See All Prescriptions View for further information.

